
Fixing Cracks in Asphalt Before Water Makes Them Worse
Fixing cracks in asphalt starts with matching the repair to the crack size and movement. Clean out loose asphalt, dirt, and moisture first. Then use flexible crack filler or hot-pour rubber for narrow cracks, and use compacted cold patch for cracks wider than 1/2 inch, broken edges, or shallow holes.
Water is the main threat. Once it gets below the asphalt, freeze-thaw cycles, heat changes, traffic, and weak base material can turn a small surface crack into a pothole or wider structural damage. Addressing cracks early helps protect drainage, appearance, safety, and your maintenance budget.
For DFW property owners and managers, the right choice also depends on whether the crack moves with temperature changes. Flexible crack sealing works best for moving cracks, while crack filling is generally used for stable, nonworking cracks.
I am Cason, and below I will walk you through how to assess, prepare, fill, seal, and maintain asphalt cracks for a repair that lasts.
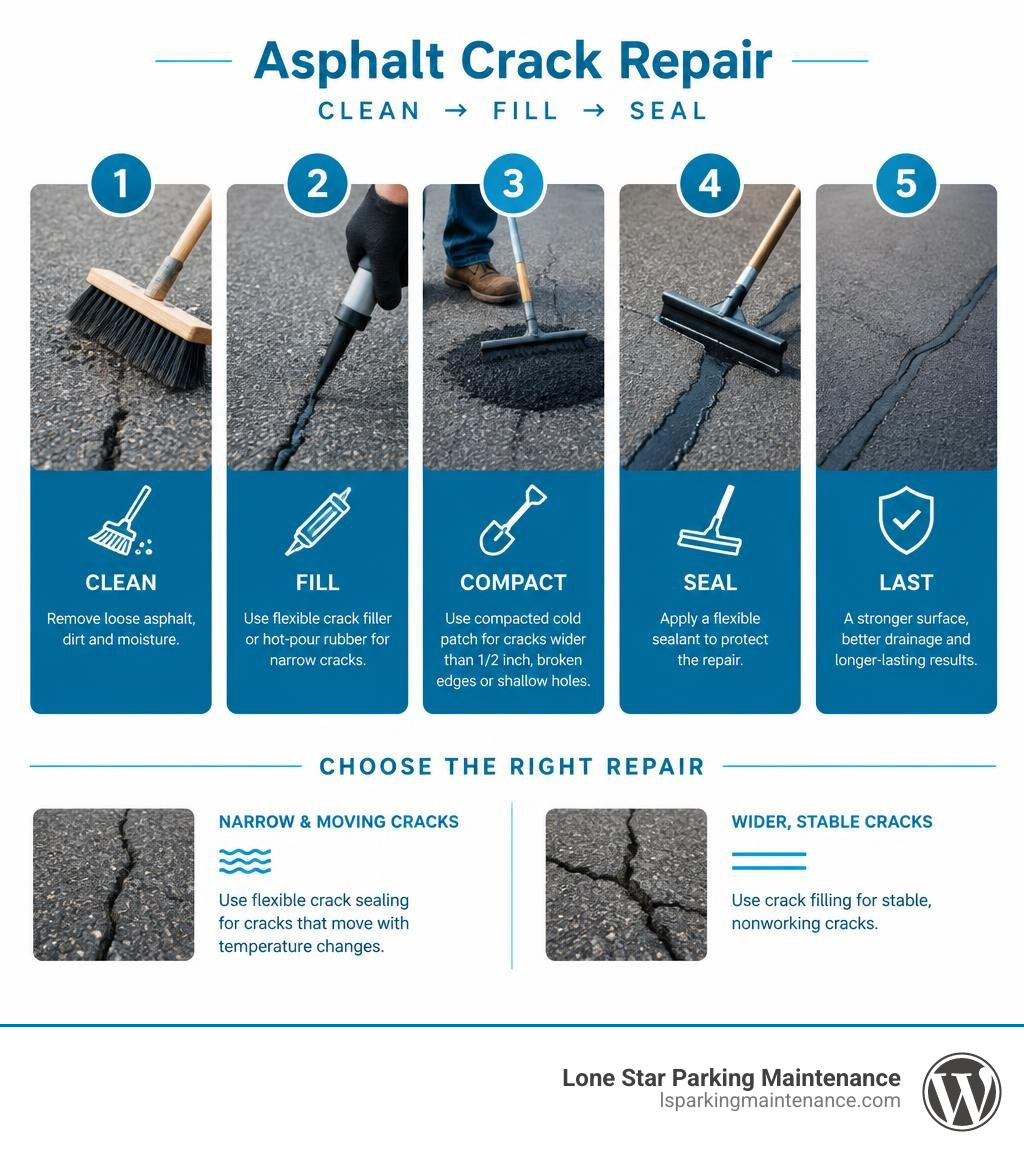
Terms related to fixing cracks in asphalt:
Understanding Asphalt Damage: Causes and Crack Types
Asphalt pavement looks solid and unyielding, but it behaves more like a flexible composite. Over time, environmental exposure, intense Texas sunshine, and constant vehicle traffic take their toll. The most frequent cause of cracks in asphalt driveways and parking areas is water that seeps below the surface. When rain penetrates the asphalt mat, it softens the underlying aggregate sub-base. During winter months, even in moderate climates like the DFW Metroplex, moisture freezes and expands, dislodging pavement layers and leaving empty voids when it melts.
A crack left untreated rarely stays the same size. In fact, a 1-inch crack can expand up to 6 inches across within six months under heavy traffic and changing weather conditions. Skipping minor maintenance allows water infiltration to undermine the structural foundation, leading directly to alligator cracking or deep potholes.
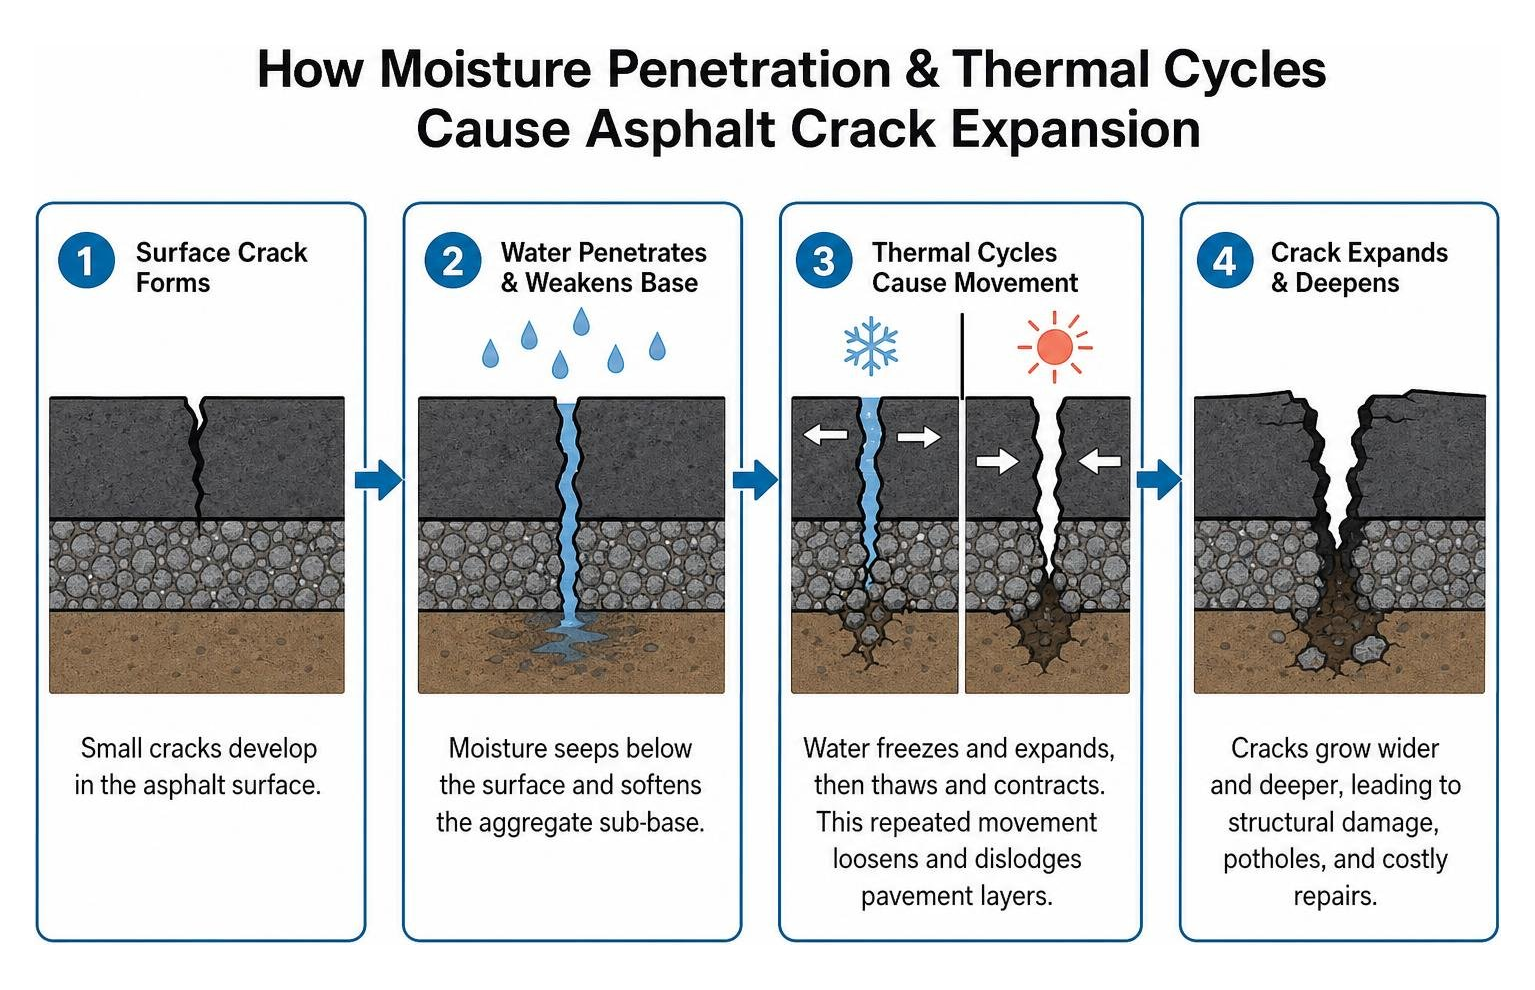
To treat the issue effectively, we must differentiate between the two major categories of pavement cracks:
- Working Cracks: These are cracks that experience significant horizontal or vertical movement—typically moving 0.1 inches (2.5 mm) or more annually. They are usually caused by thermal expansion and contraction (transverse thermal cracks) or structural deflection.
- Non-Working Cracks: These cracks experience minimal annual movement (less than 0.1 inches). They often present as longitudinal cracks running parallel to the direction of paving, diagonal distress cracks, or block cracks caused by surface oxidation.
Understanding this distinction determines whether your pavement needs crack sealing or crack filling:
| Factor | Crack Sealing | Crack Filling |
|---|---|---|
| Crack Type | Working cracks (annual movement $\ge$ 0.1 in) | Non-working cracks (annual movement < 0.1 in) |
| Ideal Timing | Early pavement life (2 to 7 years post-paving) | Mid-to-late pavement life as oxidation sets in |
| Primary Material | Highly flexible, hot-pour rubberized sealant | Standard cold-pour emulsion or rigid asphalt filler |
| Service Lifespan | 2 to 6 years | 1 to 4 years |
| Main Objective | Prevent water infiltration while allowing movement | Reduce water entry and reinforce non-moving pavement edges |
| Optimal Weather | Cool to moderate temperatures ($45^\circ\text{F}$ to $65^\circ\text{F}$) | Cool temperatures ($35^\circ\text{F}$ to $55^\circ\text{F}$) |
Crack sealing is a specialized preventive maintenance activity. It is ideally conducted shortly after working cracks develop—typically 2 to 7 years after initial construction for flexible pavements, and 1 to 3 years after resurfacing for transverse reflective cracks in overlayed pavements.
Essential Tools and Materials for Asphalt Crack Repair
Achieving a durable asphalt patch requires the right tools and professional-grade compounds. Skipping proper preparation tools or using the wrong compound is why many DIY repairs fail within a single season.
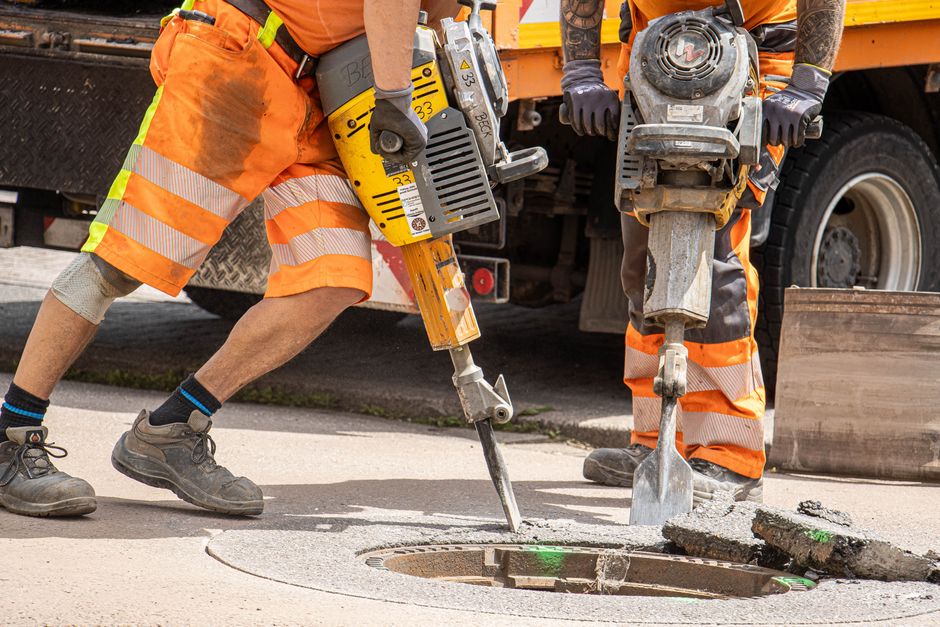
Recommended Tools
- Heavy-Duty Stiff Wire Broom or Wire Wheel: Essential for scraping away embedded dirt, moss, and loose gravel from the crack walls.
- High-Pressure Air Compressor or Leaf Blower: Used to blast out pulverized dust and fine grit. Professionals often utilize a hot-air lance to blow out and heat the asphalt simultaneously.
- Masonry Chisel and Hand Sledge: Useful for squaring broken pavement edges and undercutting loose aggregate.
- Foam Backer Rod: Closed-cell polyethylene foam rope used to plug deep cracks (over 1/2 inch deep) so you do not waste expensive filler.
- Crack Pour Pot or Caulking Gun: For smooth, controlled application of pourable sealants.
- Steel Hand Tamper or Plate Compactor: Mandatory for consolidating aggregate mixes and cold patches to prevent settling.
- Personal Protective Equipment (PPE): Safety goggles, heavy leather work gloves, and steel-toe work boots.
Material Selection Guide
Selecting the right compound depends on your crack dimensions and site conditions:
- Liquid Rubberized Emulsion (Cold Pour): Best for narrow, non-working cracks between 1/8 inch and 1/2 inch wide. Modern formulations, such as Liquid Rubber Asphalt Crack Filler, can be applied in temperatures down to $32^\circ\text{F}$ ($0^\circ\text{C}$) and cover approximately 100 to 150 linear feet per gallon.
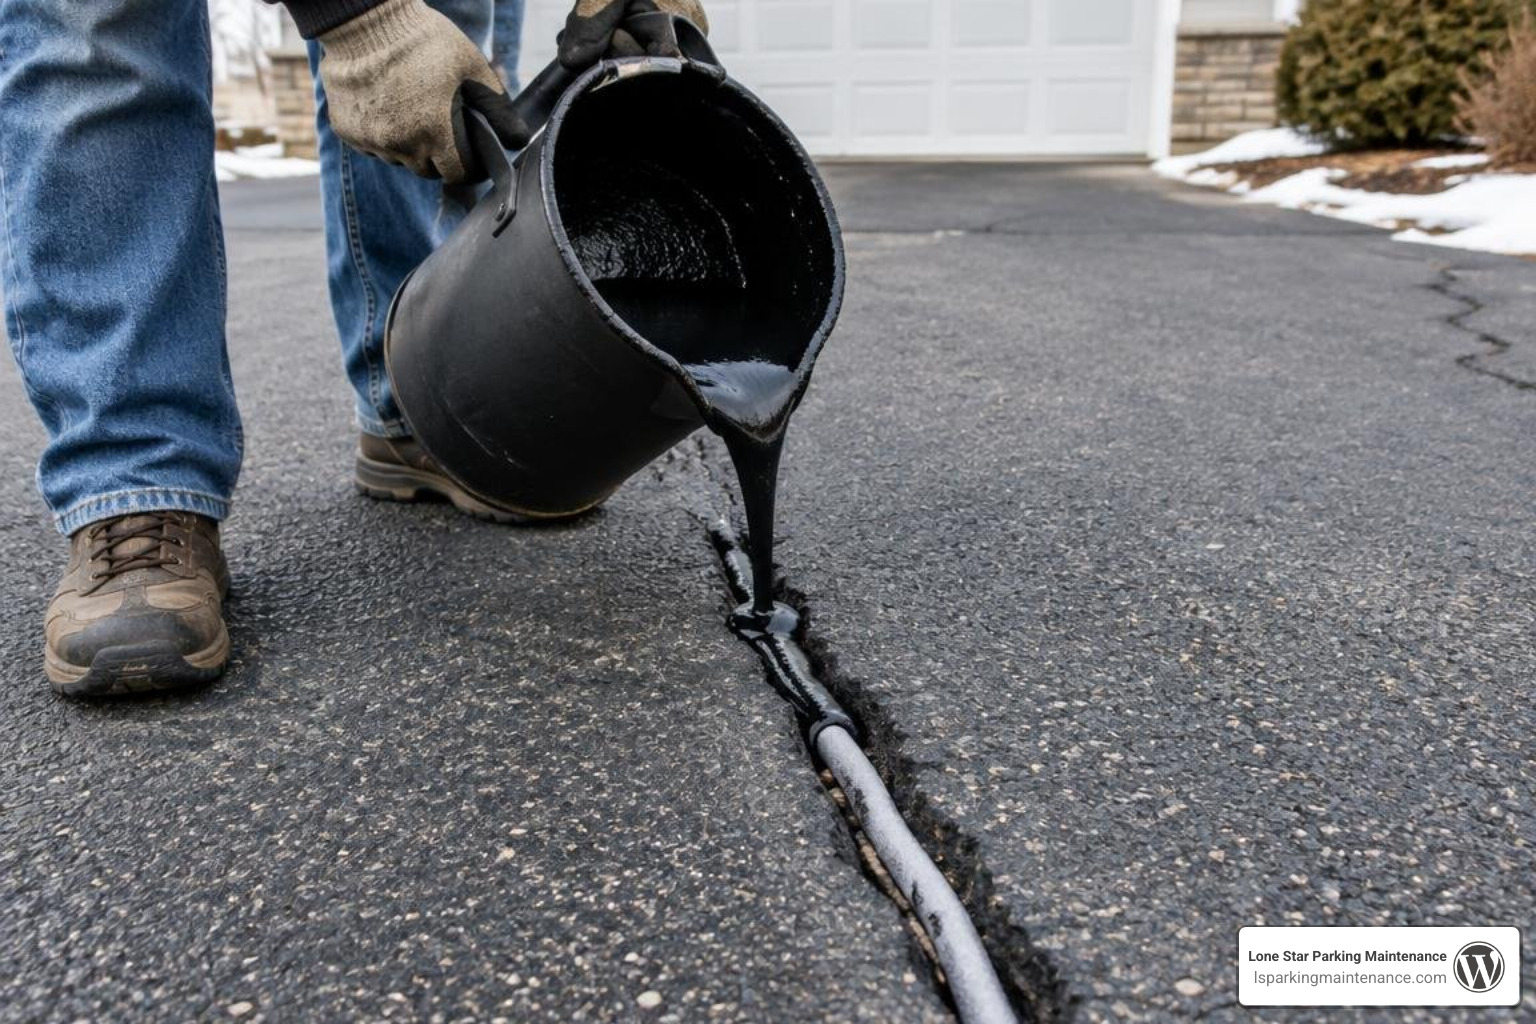
- Hot-Pour Rubberized Sealant (Thermoplastic): The gold standard for working cracks. Heated to roughly $350^\circ\text{F}$ to $400^\circ\text{F}$, this material bonds tenaciously with the pavement walls and stretches during winter contraction without tearing. Detailed application guidelines can be found in the ASPHALT PAVEMENT REPAIR MANUALS OF PRACTICE.
- Polymer-Modified Cold Patch Mix: Best for wide fissures (greater than 1/2 inch), depressions, and edge breaks. Unlike standard emergency cold bitumen, polymer-modified cold asphalt contains elastomeric additives that enhance flexibility and binding strength over several years.
Step-by-Step Guide to Fixing Cracks in Asphalt
Crack-filling operations are most productive during cool or moderately cool weather ($35^\circ\text{F}$ to $55^\circ\text{F}$ [2 to $13^\circ\text{C}$]), when cracks are at their widest opening, allowing the maximum volume of material to settle deep into the void.
Preparation Steps Before Fixing Cracks in Asphalt
Proper cleaning accounts for nearly 70% of a repair’s long-term success. If you apply compound over dust, the material will stick to the dirt rather than the asphalt substrate, causing it to peel out when tires roll over it.
- Remove Vegetation and Root Growth: Pull weeds and moss straight out by the roots. If roots remain embedded, treat them with a fast-acting herbicide several days prior to repair, or scrape them clean using a rotary weed wire brush.
- Chisel Loose Edges: Inspect the walls of the crack. If the asphalt edges are crumbling or undermined, use your hammer and masonry chisel to break away loose chunks until you reach firm, sound pavement.
- Scrape and Sweep: Run a stiff wire broom vigorously back and forth through the crack to dislodge road grime, old oxidized binder, and silt.
- Blow Out Remaining Debris: Use high-pressure compressed air or a leaf blower to blast away all pulverized dust from the inside of the fissure and the surrounding surface.
- Ensure the Pavement is Bone Dry: Never apply standard fillers to a wet or rain-soaked surface, as moisture destroys the adhesive bond. If needed, use a heat gun or propane torch to evaporate trapped moisture before applying your material.
Repairing Small Gaps vs. Fixing Cracks in Asphalt Over 1/2 Inch
Once the area is clean and dry, tailor your repair method strictly according to the crack’s dimensions.
Fixing Small Cracks (1/8 Inch to 1/2 Inch Wide)
For hairline to medium fissures, pourable elastomeric compounds provide the neatest, most resilient seal.
- Insert Backer Rod (if deeper than 1/2 inch): Press a foam backer rod into the fissure so that the depth of the remaining gap equals its width. This controls material depth and prevents excessive sinking.
- Apply the Filler: If using a cartridge, cut the nozzle at a $45^\circ$ angle and puncture the inner foil. If using a pourable jug, shake the container well. Pour or inject the liquid rubberized emulsion smoothly into the crack.
- Level the Surface: Allow the self-leveling filler to settle slightly below the pavement surface (approximately 1/16 to 1/8 inch), or use a rubber squeegee to strike the excess flush with the surrounding asphalt. Avoid spreading excess filler across unaffected pavement, as this creates cosmetic stains.
Fixing Large Cracks and Gaps (Over 1/2 Inch Wide)
Large voids, transverse breaks, and deep joint separations require aggregate structure rather than liquid sealant alone.
- Establish a Solid Sub-Base: Fill deep cavities up to 1 inch below the surface using crushed, angular gravel rather than rounded pea gravel. Angular stones lock together under pressure, creating a stable platform.
- Compact the Base: Pack the angular stone firmly using the edge of a 4×4 timber or a steel hand tamper.
- Apply Cold-Process Asphalt Compound in Layers: Pour your polymer-modified cold patch mix into the crack in layers no thicker than 1 to 2 inches at a time.
- Compact Thoroughly: Compact each layer with a hand tamper or mechanical plate compactor before adding the next. Compaction eliminates air pockets; skipping this step causes 60% of premature patch failures.
- Overfill and Final Tamp: Overfill the final layer by roughly 1/4 to 1/2 inch above grade. Tamp the patch down flush with the surrounding asphalt so that traffic compaction will not form a depression.
Post-Repair Maintenance and Preventative Care
Finishing the physical patch is only half the battle; allowing proper curing time determines whether the repair endures heavy traffic.
- Liquid Crack Filler Curing: Liquid rubber emulsions typically skin over within 30 to 60 minutes and support light pedestrian foot traffic in 2 to 4 hours. However, keep vehicle traffic off the repair for a full 24 to 48 hours to prevent tracking.
- Cold Patch Compaction and Curing: Cold asphalt remains slightly pliable while solvents evaporate. It can bear slow-moving vehicle traffic immediately after thorough compaction, but it takes 30 days to fully cure before it can receive a topcoat.
Surface Sealcoating and Ongoing Upkeep
Never apply a topcoat sealer immediately over fresh repairs. Applying driveway sealer over uncured crack filler or oily cold patch traps curing solvents, softens the new repair, and causes the sealcoat to blister or peel.
Once your repairs have cured (24 to 48 hours for liquid crack fillers and 30 days for cold-mix patches), applying a high-grade asphalt sealcoat across the entire surface creates an impermeable shield against UV rays, motor oil, and surface water. In the DFW Metroplex, resealing your asphalt every 2 to 3 years protects your investment against intense summer heat and sudden temperature drops.
Frequently Asked Questions About Asphalt Crack Repair
How long does crack filler take to cure before driving on it?
Most liquid pourable crack fillers dry to the touch within 1 to 3 hours, but they require 24 to 48 hours of dry weather to cure fully before bearing regular vehicle traffic. Humid conditions or cooler temperatures (below $50^\circ\text{F}$) will extend drying times. Polymer-modified cold patches can be driven over immediately if compacted to maximum density, though full chemical curing requires up to 30 days.
What is the difference between crack sealing and crack filling?
Crack sealing utilizes specialized, hot-applied rubberized materials engineered to stretch and compress with moving (working) cracks that shift $0.1$ inches or more annually. It offers a lifespan of 2 to 6 years. Crack filling uses less flexible cold-pour emulsions or asphalt mastics to plug non-working cracks with minimal movement, typically lasting between 1 and 4 years.
Should I sealcoat my entire driveway after repairing cracks?
Yes, sealcoating after repairs have fully cured is highly recommended. While crack filler seals individual fractures, sealcoating provides a continuous protective barrier across the entire pavement surface. It prevents oxidation from sunlight, blocks moisture penetration through microscopic pores, and gives the pavement a uniform, rich black finish.
Conclusion
Proactive pavement maintenance saves thousands of dollars over the lifespan of a driveway or commercial parking lot. Addressing small hairline fractures today prevents the sub-base erosion, extensive alligator cracking, and deep potholes that necessitate costly structural repaving tomorrow.
For large commercial properties, shopping centers, and busy surface lots in the DFW Metroplex, maintaining safe, pristine pavement requires professional equipment, high-grade hot-pour sealants, and experienced execution. We at Lone Star Parking Maintenance deliver industry-leading parking facility solutions—from precision line striping and deep cleaning to professional parking lot sealing and crack filling services. Protect your pavement foundation today by addressing cracks before moisture turns a minor repair into major downtime.