
Standing Water Is Costing You More Than You Think
Trench drain installation is one of the most effective ways to protect paved surfaces from the water damage that quietly destroys parking lots, driveways, and commercial properties every year.
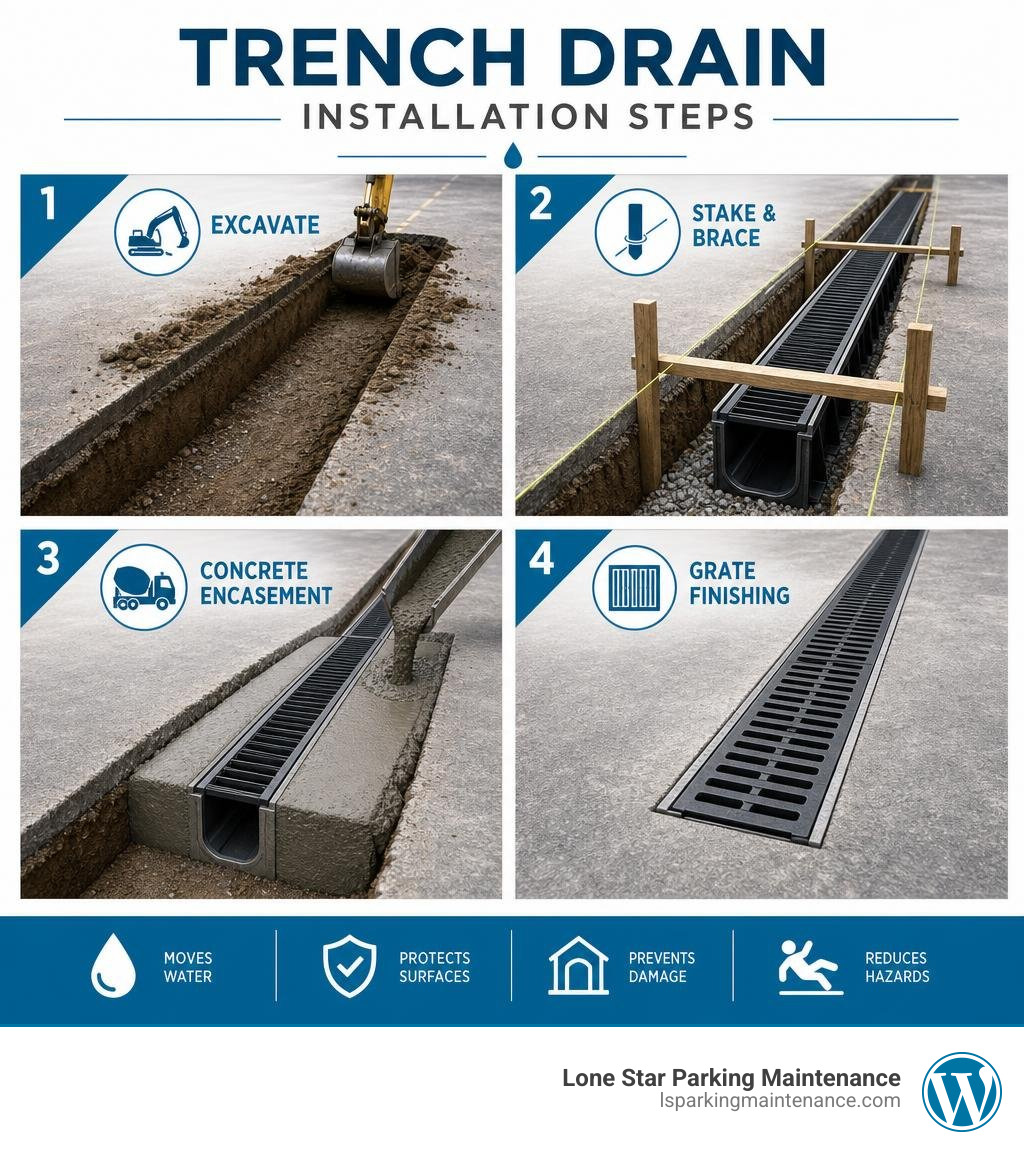
Here’s a quick overview of how to install a trench drain:
- Plan and mark the drain path, outlet location, and utility lines
- Excavate the trench with at least 4 inches of clearance on all sides
- Compact the subbase and add a gravel bedding layer
- Lay channels starting from the outlet (deepest) end, working upstream
- Stake and brace channels to prevent floating during the concrete pour
- Pour and vibrate concrete encasement, keeping the channel top 1/16″ to 1/8″ below finished grade
- Seal joints between channel sections and connect outlet piping
- Install grates after concrete fully cures
Standing water isn’t just an eyesore. It erodes pavement, weakens foundations, and creates liability hazards. A properly installed trench drain channels surface runoff away before it can do any of that.
The good news? With the right planning and tools, this is a project many property owners and contractors can tackle themselves — and potentially save thousands compared to hiring out the full job.
This guide walks you through every stage of the process, from choosing the right system to finishing the concrete.
Simple trench drain installation glossary:
Understanding Trench Drains: Types, Materials, and Load Classes
Before we grab our shovels and start digging up the DFW Metroplex, we need to understand what we are actually putting in the ground. A trench drain (sometimes called a channel drain) is a linear drainage system designed to quickly intercept and redirect surface water sheet flow over large areas.
Unlike standard spot drains that require complex four-way grading, linear trench drains only require a simple two-way slope in the surrounding pavement. This makes them incredibly efficient for parking lots, driveways, and commercial loading docks. To understand how they fit into your overall property layout, check out our guide on parking lot drainage 101.
Choosing the right material and load class is the difference between a drain that lasts for decades and one that collapses the first time a delivery truck rolls over it. Let’s look at how these materials stack up:
| Material | Best Suited For | Key Advantages | Load Class Compatibility |
|---|---|---|---|
| HDPE / Plastic | Residential driveways, patios, pedestrian walkways | Lightweight, highly chemical resistant, budget-friendly | Class A to C |
| Polymer Concrete | Commercial parking lots, gas stations, industrial parks | Excellent structural strength, low water absorption | Class A to E |
| Fiberglass | Chemical processing plants, food service, high-temperature zones | Extremely chemical resistant, lightweight, handles thermal shock | Class A to D |
| Stainless Steel | Commercial kitchens, food processing, architectural designs | Hygienic, highly aesthetic, rust-proof | Class A to C |
Types of Trench Drain Systems
Trench drains come in several configurations depending on your specific drainage needs and aesthetic goals:
- Linear Channel Drains: The standard system consisting of a U-shaped channel covered by a removable grate. These are highly versatile and easy to clean.
- Slot Drains: A sleek alternative where the channel is buried completely beneath the surface, leaving only a thin, continuous slot visible at the top. These are ideal for pedestrian plazas where heavy grates would disrupt the design.
- Catch Basins: Large square or rectangular inline boxes placed at the end or middle of a trench run. They serve as collection points to catch heavy sediment and debris before the water enters the main utility connections, preventing pipe clogs.
When laying out your system, water always flows downhill. Pre-sloped channel systems feature a built-in internal fall (typically around 0.5% to 1% slope) to keep water moving toward the outlet even when installed on flat ground.
Load Classes (A-F) and Material Selection
The European standard EN 1433 classifies trench drains into six load classes (A through F). Matching your expected traffic to the correct load class is non-negotiable for safety and structural integrity:
- Class A (15 kN / 3,372 lbs): Pedestrian and bicycle traffic only. Think backyard patios and garden paths.
- Class B (125 kN / 28,100 lbs): Private driveways, parking garages, and light vehicle parking areas.
- Class C (250 kN / 56,200 lbs): Curb sides, commercial parking lots, and low-speed shoulder areas.
- Class D (400 kN / 89,920 lbs): Heavy commercial traffic, including main highway lanes, loading docks, and gas stations.
- Class E (600 kN / 134,800 lbs): Industrial areas, warehouses, and heavy forklift traffic.
- Class F (900 kN / 202,300 lbs): Extreme loads, such as airport runways and military facilities.
As load requirements increase, so does the required depth and width of the concrete encasement surrounding the channel. For instance, a Class A system may only require a 4-inch concrete bed, while a Class E or F system requires up to 9.84 inches (25 cm) of reinforced concrete with integrated steel rebar to distribute the immense wheel loads.
Planning Your Trench Drain Installation
A successful trench drain installation begins long before the first yard of concrete is poured. Proper site preparation ensures your system handles heavy rains without backing up or shifting over time.
First, you must map out your drainage run and identify where the water will discharge. Whether you are routing the runoff to a storm sewer, a local swale, or a catch basin, make sure your plans comply with local DFW environmental regulations. For a broader look at how linear drainage fits into your property’s water management plan, read our practical guide to parking lot drainage.

Essential Tools, Supplies, and Safety Gear
Do not start digging until you have gathered the following essentials:
- Safety Gear: Safety glasses, heavy-duty work gloves, steel-toed boots, and ear protection.
- Excavation Tools: Shovels, a pickaxe, and a wheelbarrow. For larger commercial runs, renting a mini-excavator will save your back.
- Alignment & Leveling: A high-quality laser level or transit level, a heavy-duty string line, and marking paint.
- Securing Materials: #4 (1/2-inch) steel rebar stakes, tie wire, and a rebar cutter.
- Installation Supplies: Joint sealant (such as polyurethane adhesive or silicone), duct tape, and temporary plywood covers to protect the channels.
- Concrete Equipment: A concrete mixer, a concrete pencil vibrator, finishing trowels, and a wheelbarrow.
Site Preparation and Excavation Depth
Before breaking ground, always call 811 to have local utility lines marked. The last thing you want is to accidentally slice through an underground power line or water main.
Once the utilities are cleared, lay out your trench run using stakes and a tight string line set 1 to 3 inches above the final grade of the drain.
When excavating, you must dig deep enough and wide enough to accommodate both the channel itself and the surrounding concrete encasement. As a rule of thumb, you need a minimum of 4 inches of clearance on all sides (bottom and both sidewalls) of the channel. For example, if your drain channel is 6 inches wide and 8 inches deep, your excavated trench must be at least 14 inches wide and 12 inches deep.
Once excavated, thoroughly compact the soil subbase using a hand tamper or mechanical plate compactor. Add a 1-to-2-inch layer of crushed gravel or a thin concrete “mud slab” to create a stable, level foundation that prevents the drain from sinking during the pour.
Executing the Step-by-Step Trench Drain Installation
Now that the site is prepared, it is time to assemble and secure the system. Precision is key during this phase; a minor alignment error now can cause water to pool or result in cracked pavement later. For a look at how professional installations are integrated into commercial parking areas, refer to our guide to installing parking lot drains.
Step-by-Step Trench Drain Installation Guide
Follow these steps for a clean, professional-grade assembly:
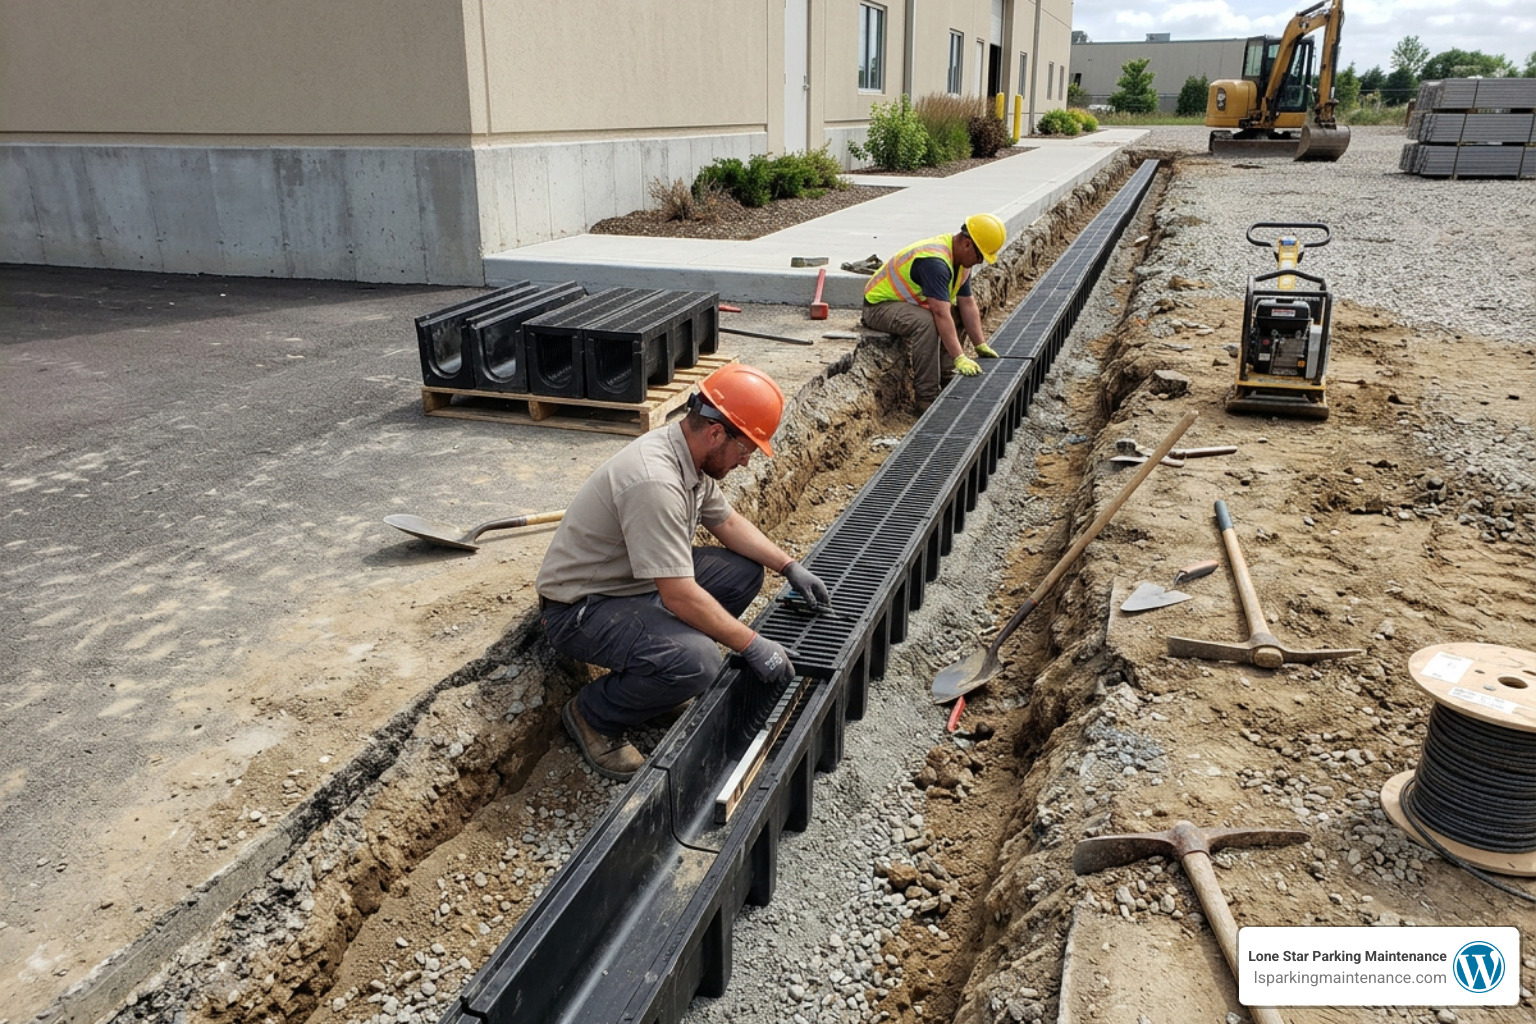
- Lay Out the Components: Lay your channel sections along the side of the excavated trench. If you are using a pre-sloped system, arrange them in numerical order according to the manufacturer’s layout drawings.
- Start at the Outlet: Always begin installation at the deepest point of your run (the discharge or outlet end) and work your way upstream. This ensures proper alignment and slope matching.
- Apply Joint Sealant: Before snapping sections together, clean the male and female interlocking joints. Apply a generous bead of high-quality polyurethane sealant to the receiving joint to guarantee a watertight connection.
- Connect the Channels: Push the sections together firmly. If your system uses mechanical fasteners or bolted flanges, secure them tightly. For extra stability, screw scrap lumber across the top joints to keep the channels perfectly aligned during the pour.
- Stake the Channels: To prevent the lightweight plastic or polymer channels from shifting or floating, drive #4 rebar stakes into the ground on both sides of the channel at 3-to-4-foot intervals. Drive them 18 to 24 inches deep in clay soils, or 36 to 48 inches deep in sandy soils. Secure the channel to the stakes using tie wire or specialized installation chairs. Refer to the DuraTrench Installation Guide for specific staking patterns.
- Verify Grade and Straightness: Double-check your elevation with a laser level. The top edge of the channel must sit 0.12″ to 0.20″ (3 to 5 mm) — roughly 1/16 to 1/8 of an inch — lower than the adjacent finished pavement. This ensures water actually flows into the drain rather than pooling along the edge.
Handling Joints, Connections, and Field Modifications
Rarely does a trench run fit perfectly without some custom field adjustments. When you need to make turns, create tees, or connect to outlets, keep these best practices in mind:
- Cutting Channels: Polymer concrete and plastic channels can be cut to length using a standard masonry saw or a circular saw with a diamond blade.
- Miter Cuts and Tee Intersections: For 90-degree turns or tee connections, make precise miter cuts on the channels and bond them together using a manufacturer-approved epoxy or resin kit.
- Installing End Caps and Outlets: Attach end caps to the shallow start of the run. At the outlet end, knock out the preformed pipe connection using a hammer while supporting the channel on a wooden block. Connect your PVC or cast iron outlet pipe using a flexible rubber coupling or pipe adapter. For detailed instructions on handling complex transitions, consult the Watts Polycast 600 and 800 Series Guide.
Concrete Encasement and Flotation Prevention
Wet concrete is incredibly dense and acts like a fluid, meaning it will try to push your lightweight drain channels up and out of the ground. This is known as “flotation.”
To prevent your drain from floating or bowing inward during the pour:
- Keep the Grates or Plywood Covers On: Never pour concrete without the grates or protective plywood covers firmly locked in place. The lateral pressure of wet concrete will easily crush or warp bare channel walls. Wrapping the grates in plastic wrap beforehand makes post-pour cleanup a breeze.
- Pour in Stages: Pour your concrete in two lifts. First, pour a “footing” layer around the base of the stakes and the bottom of the channel. Let this anchor pour set slightly to lock the drain in place before pouring the remaining sidewalls.
- Use the Right Mix: Use a concrete mix with a slump of 5 inches or greater (7 to 8 inches for channels wider than 24 inches) to ensure it flows smoothly under the channel and eliminates air pockets.
- Vibrate the Concrete: Use a pencil vibrator or carefully tap the formwork to consolidate the concrete, especially around the frame rails and anchoring ribs.
Managing Thermal Movement with Expansion Joints
Concrete expands and contracts with changes in temperature. If you do not account for this movement, your trench drain will eventually crack or buckle.
- Placement: Install expansion joints approximately 82 to 98 feet (25 to 30 meters) apart, placed perpendicular to the channel run.
- Pavement Isolation: Always install a continuous expansion joint (using styrofoam or expansion joint filler) between the concrete encasement of the trench drain and the surrounding pavement. This isolates the drain from the horizontal forces of the moving slab.
Common Mistakes in Trench Drain Installation
Avoid these frequent pitfalls to ensure your system performs flawlessly:
- Improper Slope: Installing a flat channel run with no internal slope or external grade will lead to standing water and sediment buildup.
- Removing Plywood Covers Too Early: Removing the protective plywood or grates before the concrete has fully cured can allow the channel walls to deflect inward.
- Setting the Drain Too High: If the top edge of the channel is flush with or higher than the pavement, water will pool right next to the drain instead of flowing into it.
- Poor Joint Sealing: Neglecting to use high-quality sealant between sections allows water to leak into the subgrade, which can erode the soil and cause the concrete slab to sink.

DIY Savings vs. Professional Performance
Taking the DIY route for a small residential driveway or patio trench drain can save you thousands of dollars in labor costs. If you have basic masonry tools, a strong back, and plenty of patience, it is a highly rewarding weekend project.
However, for commercial properties, large parking lots, and heavy-duty traffic areas, professional installation is almost always the smarter investment. Commercial systems require precise engineering, heavy machinery, specialized concrete mixes, and strict compliance with ADA accessibility guidelines and local environmental codes. A single mistake in a DIY commercial pour can lead to structural failure, costly pavement repairs, and potential safety liabilities. If you are debating between a trench drain and other drainage options, read our guide on French drains 101 to compare your choices.
Frequently Asked Questions about Trench Drains
How deep should a trench drain be excavated?
Your excavation depth must equal the total height of the channel section plus a minimum of 4 inches for the concrete bedding layer. If you are installing a pre-sloped system, the excavation depth must increase as you move toward the outlet end to accommodate the deeper channel sections.
What is the recommended slope for a trench drain?
A minimum slope of 1% grade (a 1/8-inch drop per foot of run) is highly recommended to prevent water pooling and to keep sediment moving through the system. Pre-sloped channel systems make this easy by building the slope directly into the concrete or plastic channels.
Can I install a trench drain without concrete?
Only specialized “Type I” trench drain systems (such as heavy-duty self-supporting block systems) can be installed without a full concrete encasement, and even then, they still require a highly compacted, load-bearing gravel foundation. Standard plastic and polymer concrete channels (Type M) must be encased in concrete to achieve their rated load capacity and to prevent them from shifting under traffic.
Conclusion
A properly executed trench drain installation is one of the single best investments you can make to protect your pavement, prevent standing water, and extend the lifespan of your property. Whether you decide to tackle a light-duty run yourself or bring in the professionals for a heavy-duty commercial upgrade, getting the details right during the planning and pouring phases makes all the difference.
If you are located in the DFW Metroplex and need a professional hand, Lone Star Parking Maintenance is here to help. From parking lot striping and sealcoating to structural repairs and professional drainage solutions, we use top-quality materials and industry-standard practices to keep your facility safe, dry, and looking its absolute best.
Ready to stop the soak on your commercial property? Connect with us at Lone Star Parking Maintenance today for a free consultation!