
Cement Crack Repair Starts With the Right Diagnosis
For cement crack repair that lasts, first check whether the concrete is level and the crack is stable. Clean out loose debris, then seal a small, level crack with a filler rated for outdoor concrete. Use a flexible joint sealant in a control joint, not a rigid patch. If the slab has shifted, sinks, or keeps cracking, get it evaluated before filling the gap. Filler cannot fix lost support beneath concrete.
Water entering a crack can make damage worse over time. I’m Cason, and I’ll help you spot the repairs worth doing yourself—and the signs that call for a professional.
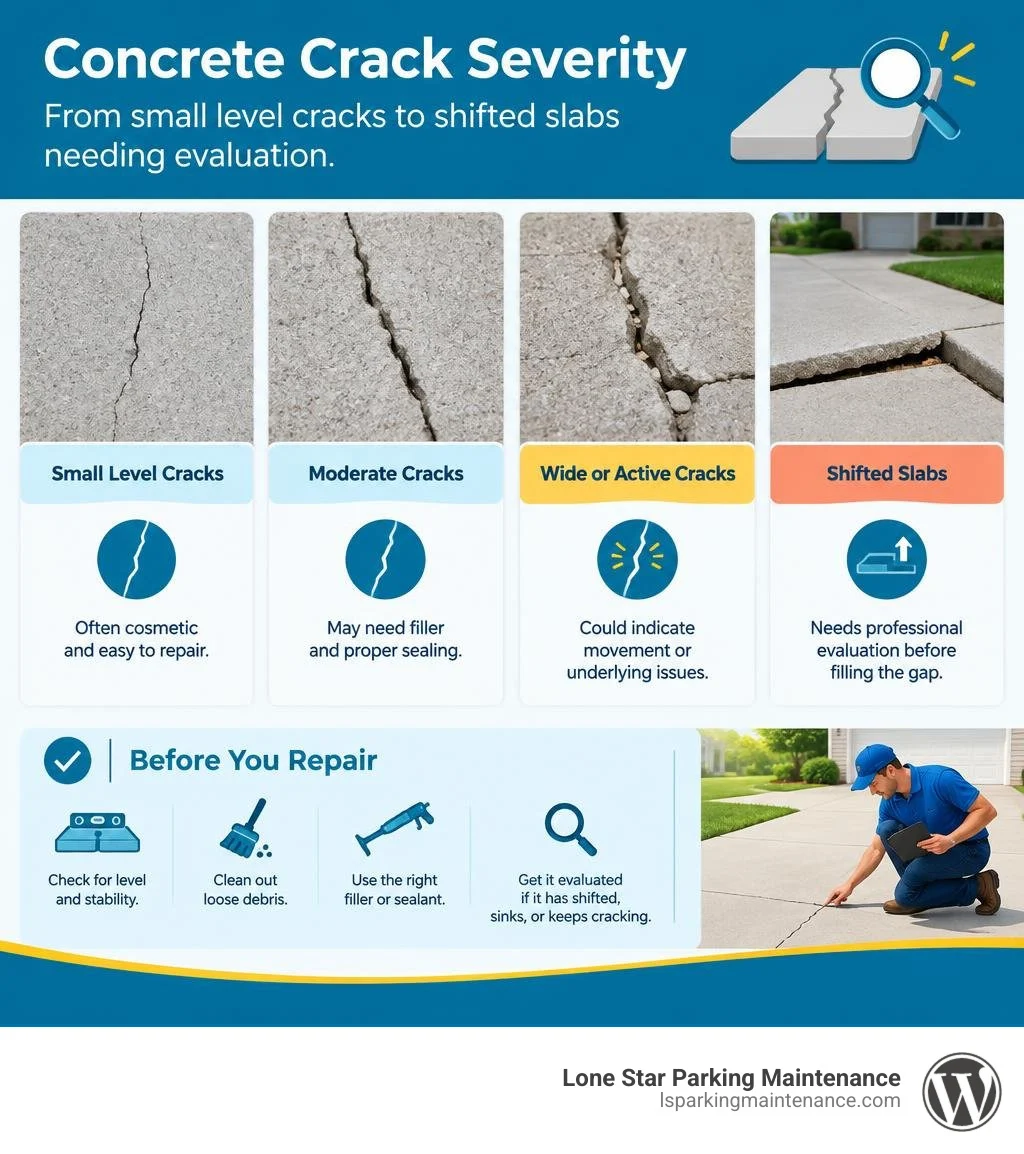
Basic cement crack repair glossary:
Assessing Slab Damage: DIY Evaluation vs. Structural Issues
Before grabbing a trowel, we must determine what caused the crack. Concrete expands and contracts as ambient temperatures swing across North Texas. During the curing process, minor drying shrinkage often produces thin surface fractures. However, deeper issues arise from shifting subgrade soils, poor drainage, or heavy point loads.
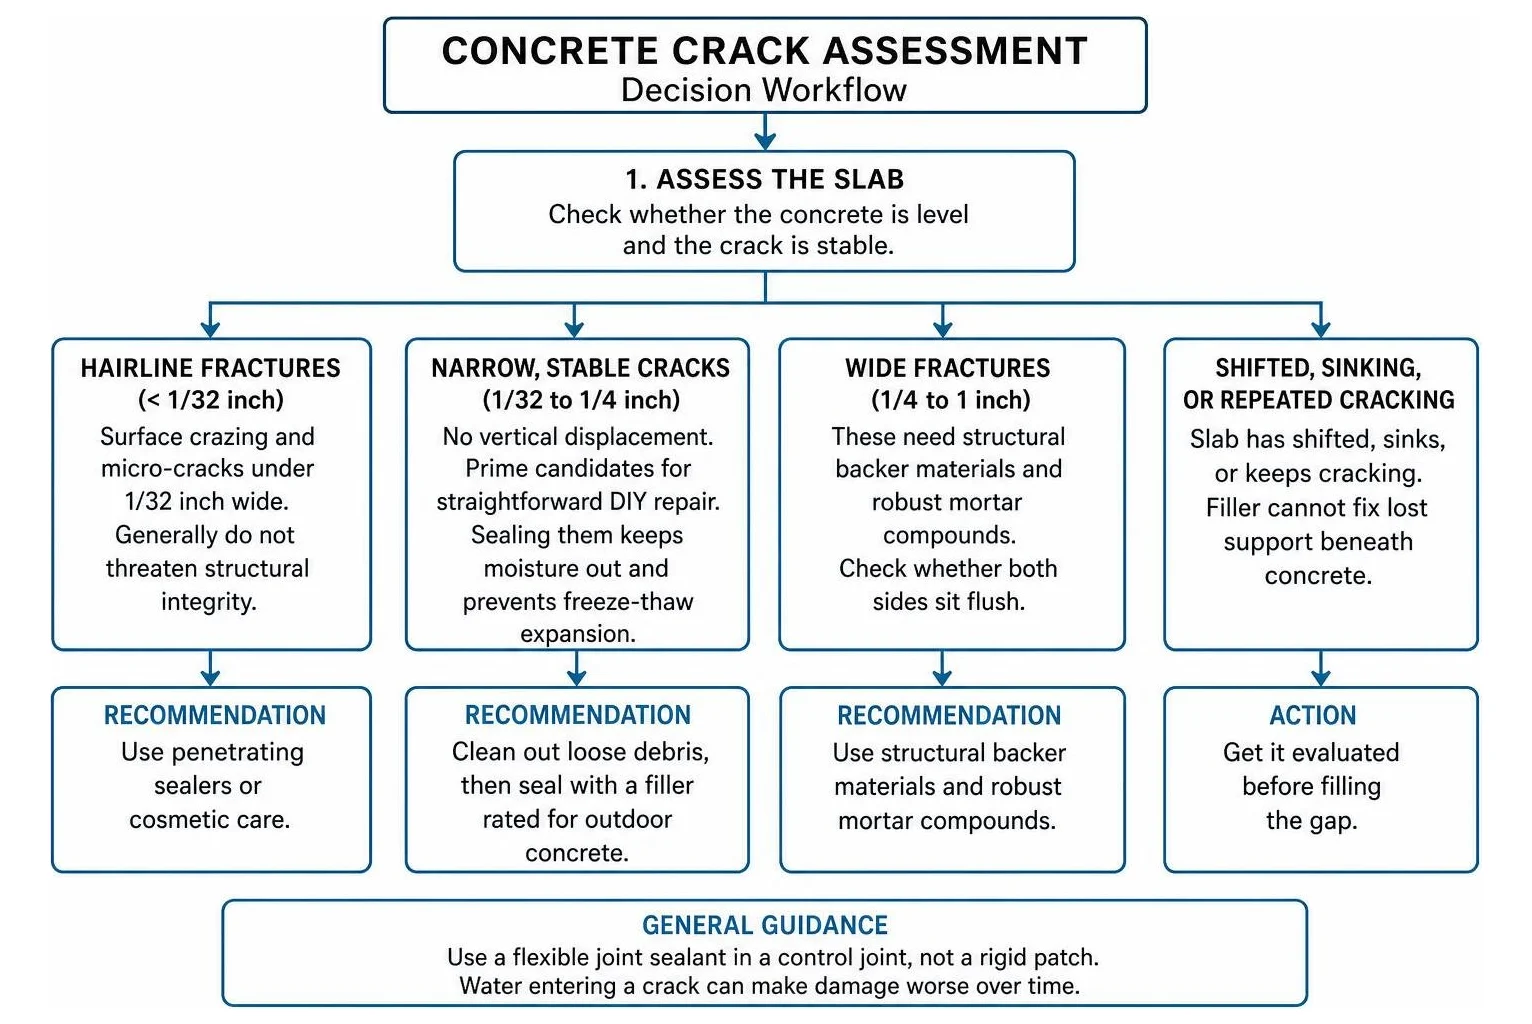
When conducting a visual inspection, measure the crack width and note any vertical offset:
- Hairline Fractures (< 1/32 inch): Surface crazing and micro-cracks under 1/32 inch wide are inherent to cementitious materials. They generally do not threaten structural integrity and often require only penetrating sealers or cosmetic care.
- Narrow, Stable Cracks (1/32 to 1/4 inch): These gaps do not exhibit vertical displacement and are prime candidates for straightforward DIY repair. Sealing them keeps moisture out and prevents freeze-thaw expansion.
- Wide Fractures (1/4 to 1 inch): These need structural backer materials and robust mortar compounds. Check whether both sides of the fracture sit flush.
- Severe Structural Faults (> 1 inch or with vertical step): Gaps exceeding an inch, or slabs showing vertical offset where one side has dropped, point to subgrade erosion or void formation.
According to the ACI 546-23 Concrete Repair Guide, a lasting repair depends on addressing the underlying distress mechanism rather than simply masking the surface. If you step on a slab and feel it rock, or if you spot hollow voids underneath, standard fillers will fail. In those situations, stabilizing the subbase takes priority over cosmetic patching.
You also need to distinguish between control joints and random fractures. Control joints are planned cuts designed to accommodate natural slab movement. Never fill a working control joint with a rigid patching compound—doing so prevents normal thermal expansion and forces new, jagged cracks to form right next to the joint.
Choosing the Right Materials for Cement Crack Repair
Selecting the correct product requires matching the material’s elasticity, bonding strength, and setting time to your specific slab condition.
| Material Type | Best Use Case | Elasticity / Flexibility | Typical Initial Set | Full Cure / Traffic Window |
|---|---|---|---|---|
| Pourable Acrylic / Latex Sealant | Narrow surface cracks (< 1/4") | Moderate | 1 to 4 hours | 24 to 48 hours |
| Polyurethane Sealant | Control joints & active cracks | High (Flexible) | 2 to 6 hours | 3 to 7 days |
| Fast-Setting Polymer Mortar | Wide, stationary gaps & spalls | Low (Rigid) | 20 minutes | Foot: 4 hrs / Vehicles: 24 hrs |
| Epoxy Repair Paste | High-strength indoor bonding | Rigid | 30 to 60 minutes | 24 hours |
| Hydraulic Water-Stop Cement | Active moisture leaks & basement walls | Rigid (Expansive) | 2 to 3 minutes | 1 to 2 hours |
For fast structural patches, products like the Sakrete Fast Setting Cement Patcher achieve an impressive 1,000 psi compressive strength in just two hours, eventually reaching 5,000 psi after 28 days. For outdoor slabs subjected to vehicle traffic and temperature swings, elastomeric polyurethane and polymer-modified cementitious mixes provide the best balance of chemical adhesion and resilience.
Step-by-Step Narrow Cement Crack Repair Process
Narrow, non-moving cracks under a quarter-inch wide are quick to seal. If you are filling every crack in your driveway, follow this reliable sequence:
- Clean the Gap: Remove all dirt, moss, and loose aggregate using a stiff wire brush or high-pressure air.
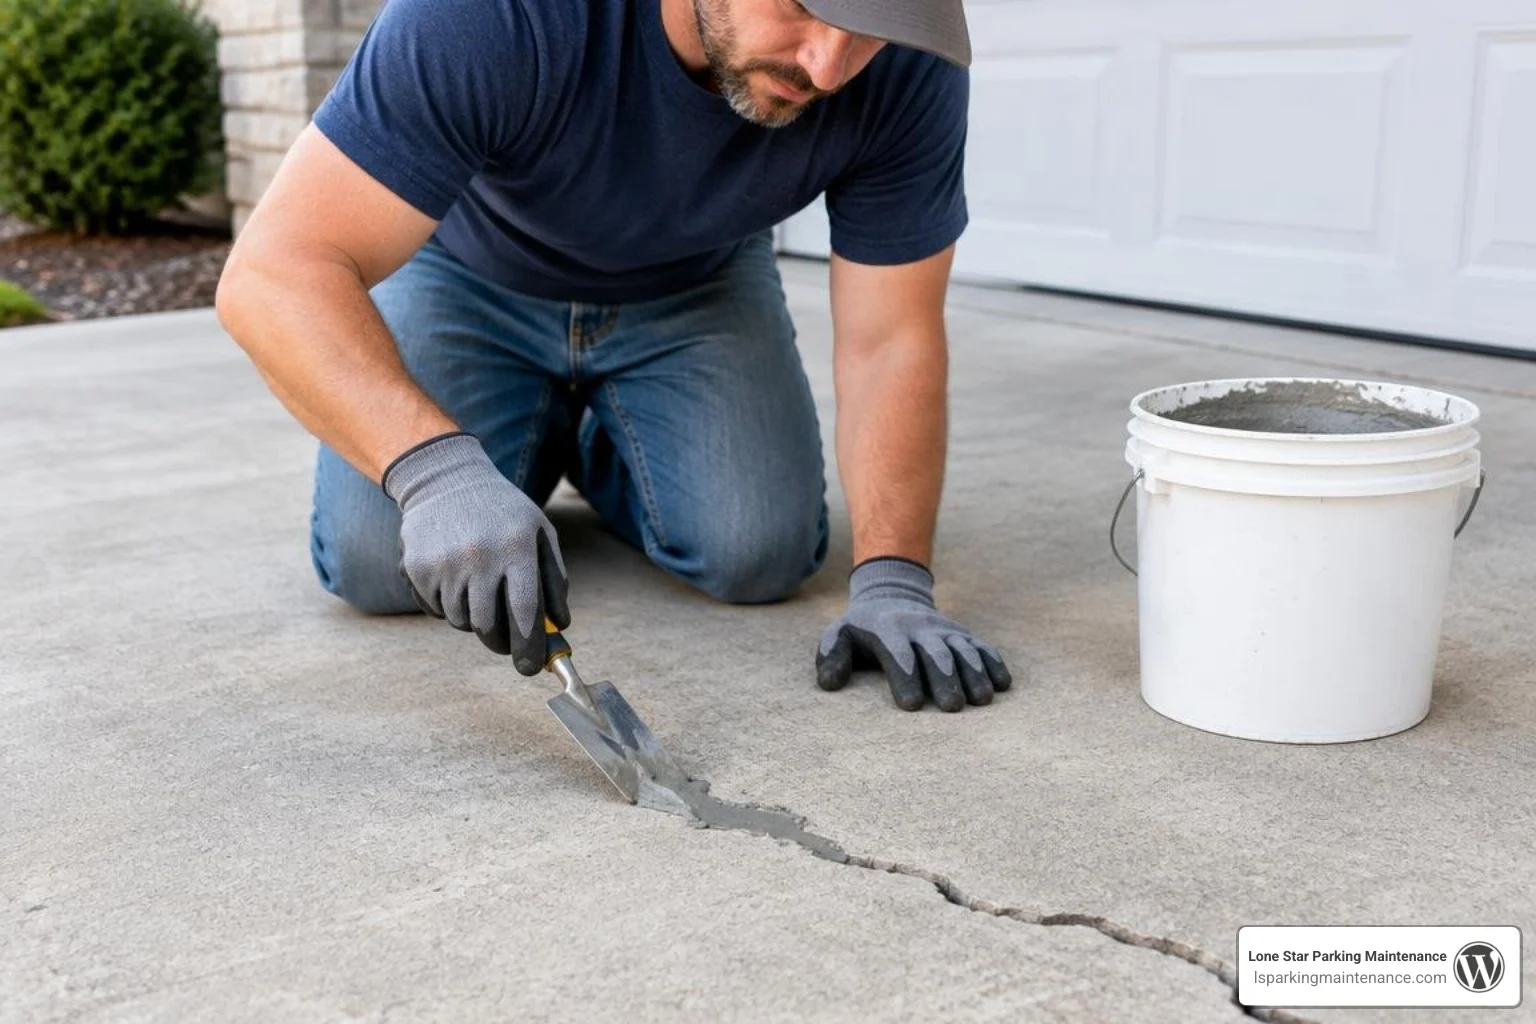
- Apply Pourable Crack Filler: Snip the applicator tip of your self-leveling sealant bottle to match the gap width. Slowly draw the nozzle along the crack, allowing the liquid to sink deep into the void.
- Smooth the Surface: Use a flexible putty knife or small pointing trowel to strike the filler flush with the surrounding slab.
- Protect During Cure: Keep foot traffic off the area for at least four hours and allow a full 24-hour cure before driving over it.
Backer Rods and Structural Cement Crack Repair for Wide Gaps
When repairing cracks wider than 1/4 inch, applying liquid caulk alone leads to sagging and premature failure. Deep gaps require depth control:
- Widen and Undercut the Edges: Using a cold chisel and small sledgehammer, chip along the crack walls to create an inverted V-notch or square shoulder. Avoid V-shaped tapers that narrow toward the bottom, as expanding repair compounds can pop loose under load.
- Insert Closed-Cell Foam Backer Rod: Press a foam backer rod into the crack until it sits roughly 1/2 inch below the concrete surface. The backer rod controls the sealant depth and prevents three-sided adhesion, allowing the patch to flex naturally.
- Mix and Pack the Compound: For dry structural repairs, mix your polymer-modified repair mortar to a stiff putty consistency. For active water intrusion, apply a rapid-setting hydraulic compound, as outlined in the Quikrete Guide to Repairing Leaks and Wall Cracks. Hydraulic cement sets in as little as 2 to 3 minutes, so mix only what you can press firmly into the gap immediately.
- Tool and Texture: Pack the mortar tightly over the backer rod, overfilling slightly, then strike it flush with a margin trowel. Match the surrounding surface texture using a stiff-bristled broom or wood float.
Essential Tools, Surface Preparation, and Application Steps
A concrete repair is only as durable as the surface preparation beneath it. Applying high-end compound over loose dust or oil guarantees bond failure.
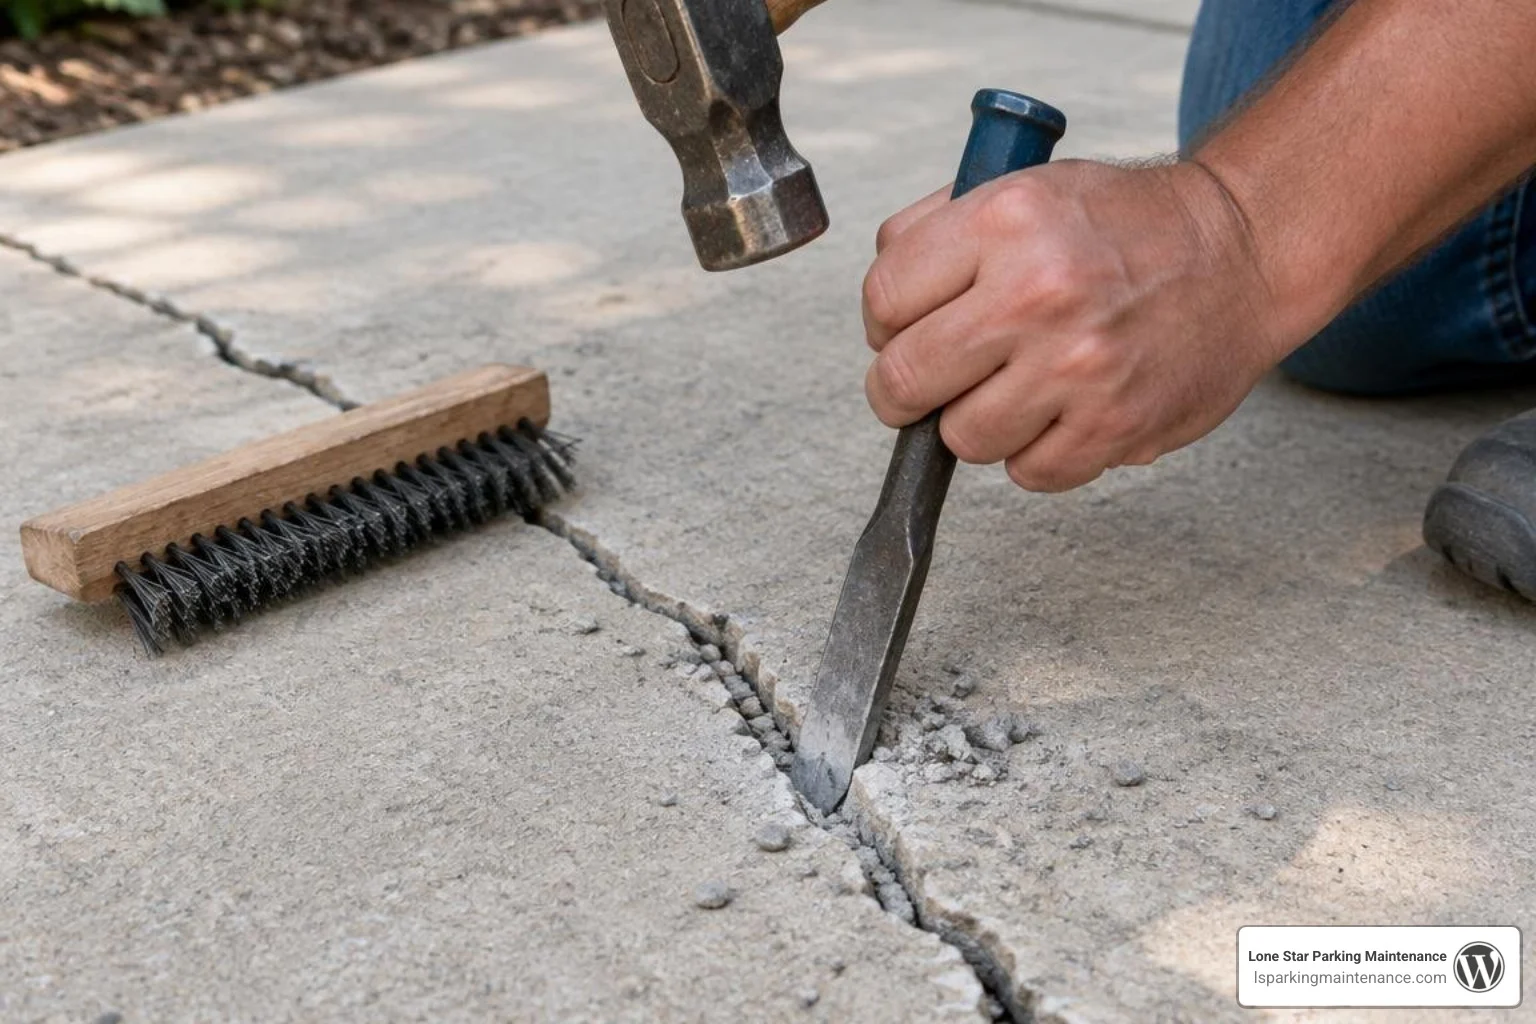
Required Tools and Safety Gear
- Heavy-duty work gloves and safety glasses
- N95 dust mask or respirator (especially when dry-chiseling or grinding)
- Cold chisel, masonry hammer, or angle grinder with diamond wheel
- Stiff wire brush and shop vacuum
- Pointing trowel and wood float
- Caulk gun and backer rod insertion tool
Step-by-Step Preparation
- Mechanical Cleaning: Chisel away all spalled, crumbly concrete down to sound, solid aggregate. As detailed in the MU Extension Guide on Sidewalk Crack Repairs, widening the fissure slightly below the surface helps the fresh mortar lock mechanically into place.
- Degrease and Flush: Clean any vehicle oil or grease spots with a dedicated concrete degreaser. Rinse thoroughly with a pressure washer or hose.
- Substrate Dampening (SSD Condition): Before applying cement-based mortars, dampen the concrete to a Saturated Surface Dry (SSD) condition. The surface should be dark and moist, but free of standing puddles. This prevents dry parent concrete from sucking essential water out of your fresh patch mix.
- Bonding Primer Application: Brush an acrylic bonding agent directly onto the interior crack walls just before packing in your mortar mix to ensure maximum chemical adhesion.
Curing Times, Environmental Factors, and Common DIY Mistakes
Ambient weather conditions make or break concrete work. The ideal working temperature for cementitious patchers and elastomeric sealants sits between 40°F and 90°F.
Working under direct, blazing sun causes rapid surface evaporation, leading to plastic shrinkage cracks and weak, powdery patches. Conversely, temperatures near freezing stall the hydration process. If rain threatens within 12 to 24 hours, postpone outdoor patching to avoid surface washouts.
Common DIY Mistakes to Avoid
- Overwatering the Mix: Adding extra water makes mortar easier to spread, but it drastically reduces compressive strength and causes severe shrinkage during cure.
- Filling Working Expansion Joints with Rigid Mortar: Expansion and control joints must breathe. Use flexible polyurethane or polyurea sealants—never rigid cement.
- Ignoring Depth-to-Width Ratios: Filling a deep 2-inch void entirely with sealant without a backer rod leads to joint failure and wasted material.
- Skipping Proper Moisture Curing: Large mortar patches require moisture retention. Mist the patch periodically or cover it with a polyethylene sheet for 48 hours to reach its rated strength. If your entire slab has widespread surface pitting, you may benefit more from complete garage floor resurfacing rather than spot patching.
Long-Term Maintenance and Concrete Protection Strategies
Once your cracks are sealed, proactive maintenance protects your investment and preserves slab integrity. Ongoing concrete and asphalt maintenance prevents small stress fractures from evolving into major structural failures.
- Apply Penetrating Sealers: Every two to three years, apply a breathable silane-siloxane penetrating sealer across outdoor concrete. These sealers soak into capillary pores to repel water and deicing chemicals without trapping vapor underneath.
- Inspect Control Joints Seasonally: Inspect joint sealants every spring and autumn. Replace torn or weathered caulk before winter moisture penetrates the subbase.
- Correct Landscape Drainage: Ensure roof downspouts and yard sprinkler heads direct water away from driveway and walkway edges to prevent soil erosion and subgrade settlement.
Frequently Asked Questions About Concrete Repair
Can I use epoxy injection for outdoor driveway cracks?
Epoxy injection is an outstanding structural repair method for indoor slabs, basement walls, and bridge columns, but it has distinct limitations on outdoor driveways. Epoxies cure into a rigid plastic that lacks flexibility. When outdoor slabs expand and contract under severe seasonal temperature swings, rigid epoxy often shears away from the concrete faces or forces new cracks to open nearby. Additionally, standard epoxies degrade under prolonged UV exposure unless protected by a topcoat. For exterior driveways subjected to thermal cycling, flexible polyurethane sealants perform far more reliably.
How do temperature and rain affect cement repairs?
Cement patching compounds rely on a controlled chemical reaction called hydration. When temperatures drop below 40°F, hydration slows down or stops, leaving the material brittle. Temperatures above 90°F cause water to flash-evaporate, resulting in cracking and poor bonding. Rain falling on uncured mortar dilutes the surface mix, washes away cement paste, and ruins the finish. Always schedule repairs when you have a dry 24- to 48-hour forecast with mild ambient temperatures.
When should I resurface instead of replacing a concrete slab?
Resurfacing works best when the concrete slab remains structurally sound, level, and well-supported, but suffers from cosmetic surface defects such as widespread crazing, shallow spalling, or minor salt pitting. A polymer-modified resurfacer restores a fresh, uniform wear layer over the entire area. However, if more than 30% of the slab is deeply fractured, sections have settled unevenly, or tree roots have lifted panels, resurfacing is only a temporary band-aid. In those cases, partial panel replacement or subbase stabilization is the only permanent solution.
Conclusion
Carrying out prompt, well-executed repairs on your concrete surfaces protects your property from costly water damage, trip hazards, and progressive structural failure. By properly diagnosing the root cause, preparing clean edges, and choosing compatible elastomeric sealants or high-strength mortars, you can achieve durable results that stand up to daily traffic and weather.
For large commercial properties, parking garages, and busy surface lots across the DFW Metroplex, our team at Lone Star Parking Maintenance delivers full-service pavement solutions built to strict industry standards. From high-durability striping and power washing to professional parking lot sealing and crack filling, we help you protect your investment, maintain safety, and keep your facilities looking their best year-round.