
Repair Damage Before It Spreads With Garage Floor Resurfacing
Garage floor resurfacing can restore a sound but pitted, stained, or lightly cracked concrete slab without replacing the entire floor. Start by checking that the slab is solid: remove loose concrete, clean away oil and salt, repair cracks and deep pits, then mechanically profile the surface before applying a cement-based resurfacer or a protective coating.
Resurfacing is a good fit when damage is mostly at the surface. If the slab is crumbling deeply, sinking, or showing signs of major movement, an overlay may fail and replacement or structural repair may be the safer choice.
A properly restored garage floor does more than look better. It can reduce concrete dust, improve traction, make oil spills easier to clean, and protect the surface from vehicle wear and moisture.
I am Cason, and this guide will help you decide whether your garage floor can be resurfaced and how to do the job correctly.
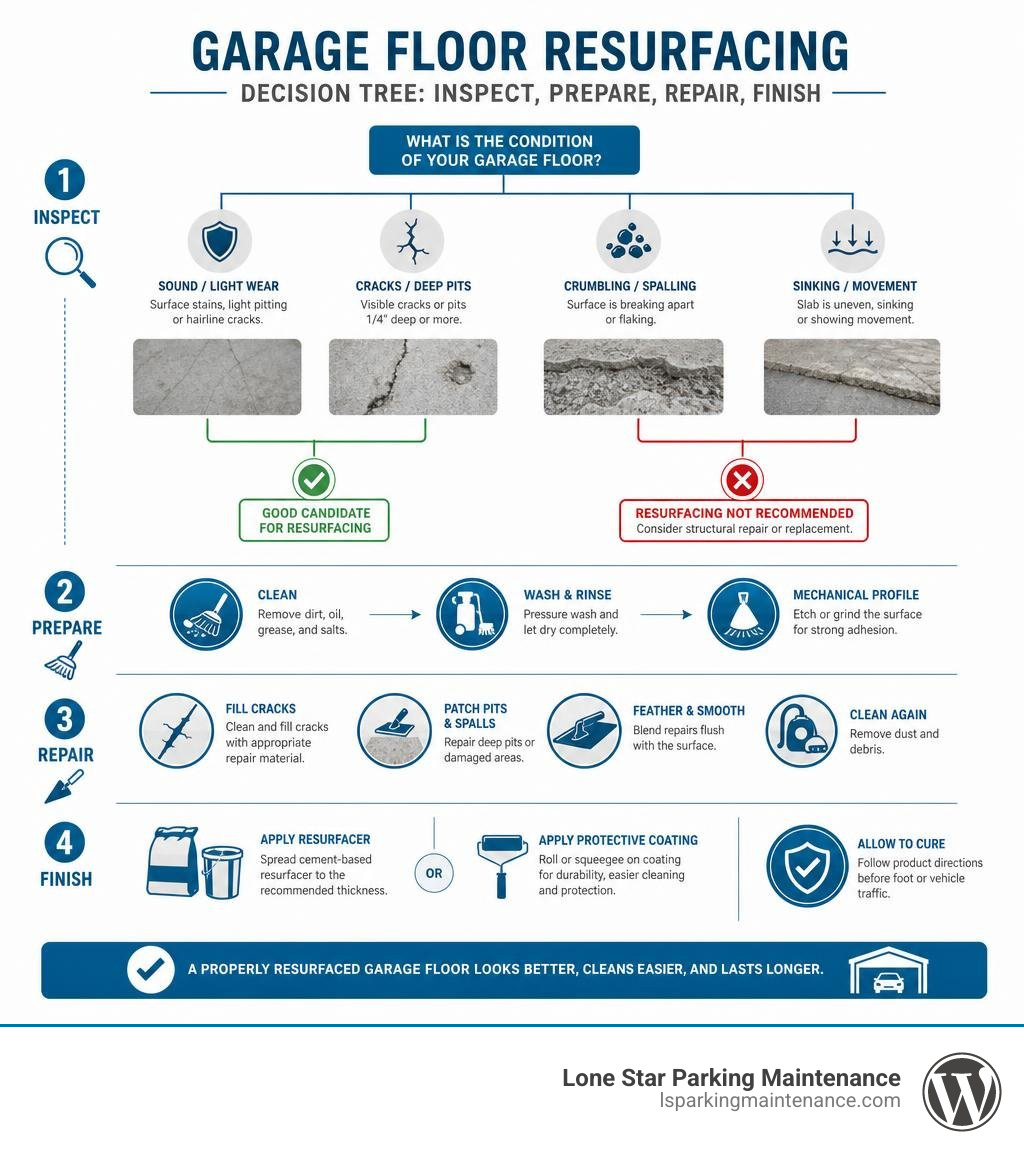
Important garage floor resurfacing terms:
Evaluating Concrete: Resurfacer, Epoxy Coating, or Paint?
When dealing with a rough, tired concrete floor, it helps to understand what is happening beneath your tires. A garage floor is subjected to immense structural wear: point-load pressures from vehicle jacks, abrasive friction from turning tires, dropped tools, and corrosive deicing chemicals dragged in from the street.
Before picking up a tool, you must evaluate the substrate’s overall condition and determine whether you need a cementitious restoration, a high-build resinous system, or a basic aesthetic touch-up.
Concrete Damage Assessment and Suitability for Garage Floor Resurfacing
Most residential garage slabs are poured as uncoupled “floating slabs,” meaning they sit inside the foundation walls without bearing the home’s structural load. While this makes surface repairs manageable, an overlay still demands a structurally sound base. If the underlying subbase compaction has settled or the concrete mix ratio was defective from the start, a thin overlay will inevitably delaminate.
To evaluate whether your slab is a good candidate for restoration:
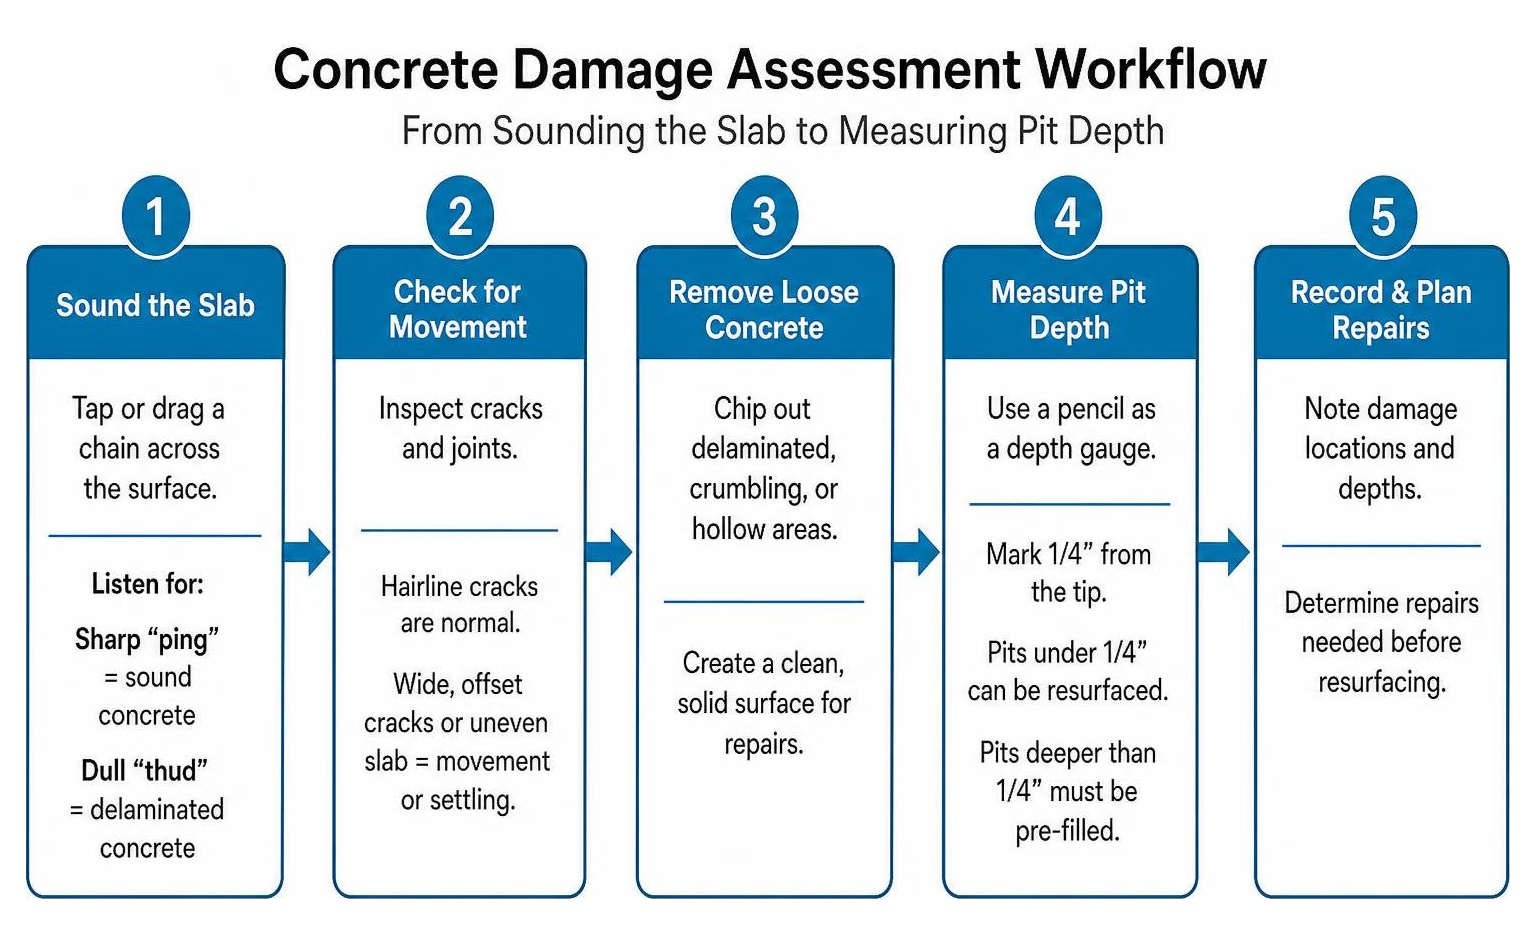
- Check the depth of pits and craters: Take a pencil, mark a line 1/4 inch from the tip, and poke around the surface. Shallow spalling and pitting under 1/4 inch can be leveled directly with resurfacers. Divots deeper than 1/4 inch must be pre-filled with a structural patching compound.
- Inspect for structural movement: Hairline shrinkage cracks are normal. However, wide, offset cracks where one side of the slab has sunken or lifted indicate foundation settling. Resurfacing over shifting slabs will cause reflective cracking in short order. When evaluating major shifts, don’t let your floor crack under pressure—address soil stability or drainage issues before attempting surface treatments.
- Sound out delaminated areas: Tap suspicious areas with a hammer or drag a heavy steel chain across the slab. A crisp, high-pitched “ping” means sound concrete; a hollow, dull “thud” reveals delaminated concrete beneath the surface that must be chipped away before continuing.
Comparing Resurfacers, Resinous Coatings, and Concrete Paints
Choosing the right material depends on whether you need to restore lost concrete mass, protect the slab against harsh chemicals, or simply alter its color.
- Cementitious Concrete Resurfacers: These are polymer-modified, high-strength Portland cement formulations designed to bond directly to damp concrete in layers ranging from 1/16 to 1/4 inch thick. They are best for restoring pitted, cratered, or spalled slabs back to a uniform, level, like-new concrete appearance.
- 100% Solids Epoxy Coatings: True two-part epoxies create a molecular chemical bond with concrete pores via bisphenol A polymer cross-linking. Curing into a hard, 10- to 15-mil-thick barrier, professional-grade epoxy systems offer up to three times the hardness of standard concrete and deliver long-lasting resistance against oil, gas, and hot tire pickup.
- Latex or Acrylic Floor Paints: 1-part retail paints dry purely through water or solvent evaporation, leaving behind a thin 2- to 3-mil film sitting on top of the slab. They are susceptible to peeling within 1 to 3 years under hot tires (a phenomenon called “hot tire pickup,” where heated tire rubber softens the paint film and pulls it up upon cooling).
| Feature / Metric | Polymer Concrete Resurfacer | 100% Solids Epoxy Coating | 1-Part Concrete Floor Paint |
|---|---|---|---|
| Primary Function | Restores lost surface mass & levels pits | High-durability chemical & wear armor | Light cosmetic coloring |
| Typical Thickness | 1/8 inch (125 mils) | 10–15 mils per coat | 2–3 mils per coat |
| Bond Mechanism | Polymer-cementitious mechanical grip | Catalyzed chemical cross-linking | Surface adhesion via drying |
| Hot Tire Resistance | Excellent (Acts like fresh concrete) | Superior (Chemical & heat immune) | Poor (Softens and lifts easily) |
| Expected Longevity | 10–15+ years | 10–20+ years | 1–3 years |
| Average Material Cost | $0.40–$0.70 / sq. ft. | $1.50–$3.00 / sq. ft. | $0.20–$0.40 / sq. ft. |
Essential Preparation and Safety Protocols for Garage Floor Resurfacing
No matter how advanced your resurfacer or coating is, 90% of all flooring failures stem from inadequate surface preparation. Concrete is naturally porous, but decades of vehicle traffic leave behind oil, road grime, curing compounds, and trapped moisture that prevent mechanical bonding.
Moisture Testing, Degreasing, and Chemical Safety Precautions
Before investing time and money, verify that your slab is not pushing water upward. Hydrostatic pressure and high moisture vapor emission rates (MVER) will break the bond of overlays and resinous coatings, causing blisters and flaking.
- The Plastic Sheet Moisture Test: Cut a 2×2-foot sheet of heavy clear plastic (6-mil) and tape all four edges tightly to the bare slab with duct tape. Leave it undisturbed for 24 to 48 hours. If the underside collects condensation droplets or the concrete underneath turns dark with moisture, your slab has high moisture vapor emissions that require specialized moisture-mitigation primers.
- The Sealer Water Drop Test: Splash a few ounces of clean water onto various sections of the garage floor. If the water immediately absorbs and darkens the concrete, the pores are open. If it beads up into tight droplets, a topical sealer or curing agent is present and must be removed mechanically or chemically.
- Pore Degreasing: Soak heavy engine oil stains in concentrated industrial concrete degreaser. Scrub the spot vigorously using a stiff-bristled push broom, allow the chemical to lift the embedded oil for 20 minutes, and rinse thoroughly. For deep stains, a second pass is recommended.
- Chemical and Respiratory Safety: Always prioritize personal protective equipment (PPE). Wear heavy nitrile or chemical-resistant gloves, splash-proof safety goggles, and an organic vapor respirator when handling chemical strippers or catalyzed resins. If grinding dry concrete, use an OSHA-compliant N95 or HEPA-filtered respirator to protect against airborne crystalline silica dust. For broader facility maintenance strategies, explore our guide on concrete and asphalt maintenance. For detailed chemical prep, you can also consult this complete DIY guide to garage floor epoxy.
Crack Chasing, Patching, and Surface Profiling Techniques
Applying a liquid resurfacer over open cracks will cause the new material to sink into the voids and crack along the same lines. You need to repair the concrete profile first.
- V-Groove Crack Chasing: Mount a diamond crack-chasing blade onto an angle grinder. Cut along all cracks to open them into a clean, uniform “V” profile. This removes crumbling edges and creates a wide base for the patch to anchor into.
- Patching Holes and Cracks: Vacuum out all dust with a HEPA vacuum. For dynamic cracks, use a rigid polyurea or fast-setting epoxy mortar filler. For deep static pits over 1/4 inch, mix a stiff batch of cementitious patching compound or hydraulic cement, pack it firmly into the void with a steel trowel, and scrape it flush with the surrounding concrete.
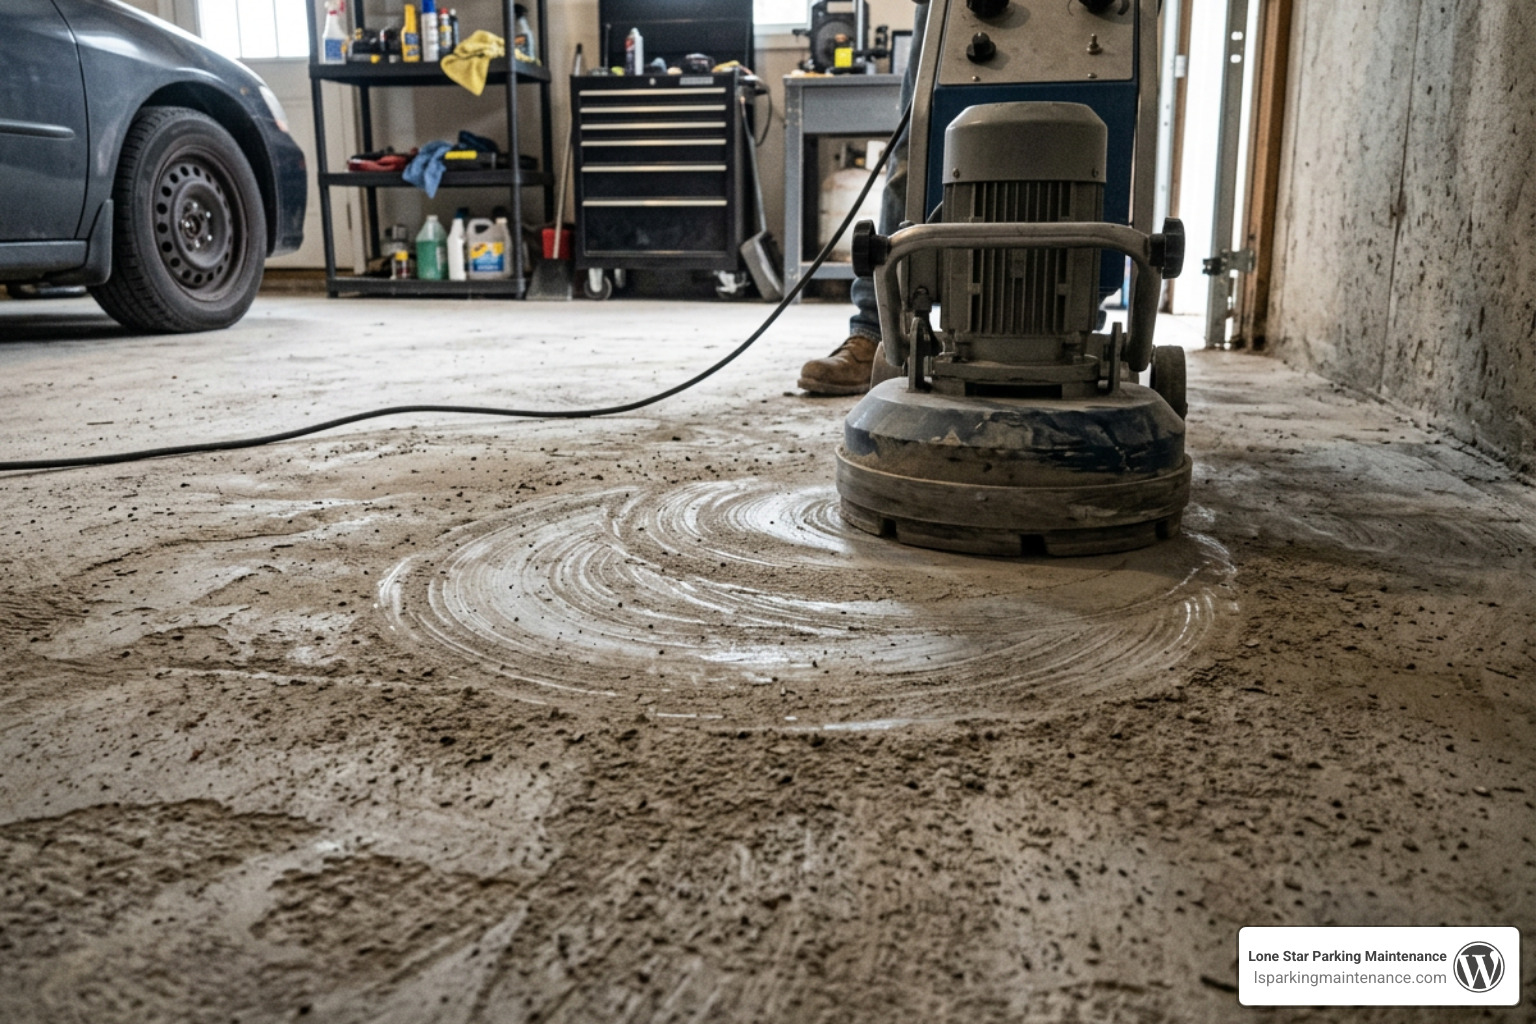
- Mechanical Profiling vs. Acid Etching: While DIY kits often include packets of muriatic or sulfamic acid, acid etching yields inconsistent results on hard-troweled or sealed modern concrete. Diamond grinding using a rented walk-behind planetary floor grinder is the preferred standard. Grinding opens the concrete pores and creates an International Concrete Repair Institute (ICRI) Concrete Surface Profile (CSP) resembling 80-grit sandpaper, giving repair mortars a strong mechanical grip.
Step-by-Step Guide to Resurfacing a Damaged Concrete Slab
With the slab cleaned, patched, and profiled, you are ready to apply a polymer-modified self-leveling concrete resurfacer. This process restores damaged, pitted garage floors into flat, clean slabs.
Mixing and Pouring Self-Leveling Resurfacing Mortar
Timing and hydration are critical when working with cementitious resurfacers. Because these products set rapidly, always recruit a helper: one person handles continuous bucket mixing while the other pours and finishes the material.
- Protect Walls and Create Perimeter Dams: Mask the bottom 3 feet of your drywall with 6-mil plastic sheeting to shield against splashes. Install heavy-duty adhesive vinyl weather stripping along the garage door threshold to act as a temporary dam, preventing the liquid resurfacer from running down the driveway. Place weather strips inside expansion joints to preserve the expansion gaps.
- Achieve Surface Saturated Dry (SSD) Condition: Soak the entire concrete floor with clean water using a garden hose. The slab must absorb moisture so it does not pull water out of the wet resurfacer mix prematurely. Sweep out all standing puddles—the concrete should be damp and dark, but with zero standing water on top.
- Mix with Precision: Pour the exact amount of clean, cool water specified on the bag into a 5-gallon bucket (typically 3.5 to 4.0 quarts per 40 lb bag). With a 1/2-inch heavy-duty drill and paddle mixer running at 600–650 RPM, slowly add the dry powder. Mix for 2 to 3 minutes until smooth and lump-free. Let the mixture “slake” (rest undisturbed) for 2 minutes to allow chemical additives to activate, then remix for 60 seconds. For engineered high-traction aggregate alternatives, review quartz sand self-leveling system specifications.
- Pour in Manageable Sections: Resurfacer has a working pot life of roughly 20 to 30 minutes at 70°F. Work in sections of no more than 150 square feet at a time. Pour the mixed mortar onto the floor in long, ribbon-like strips across the concrete.
Squeegee Spreading, Broom Finishing, and Curing Timelines
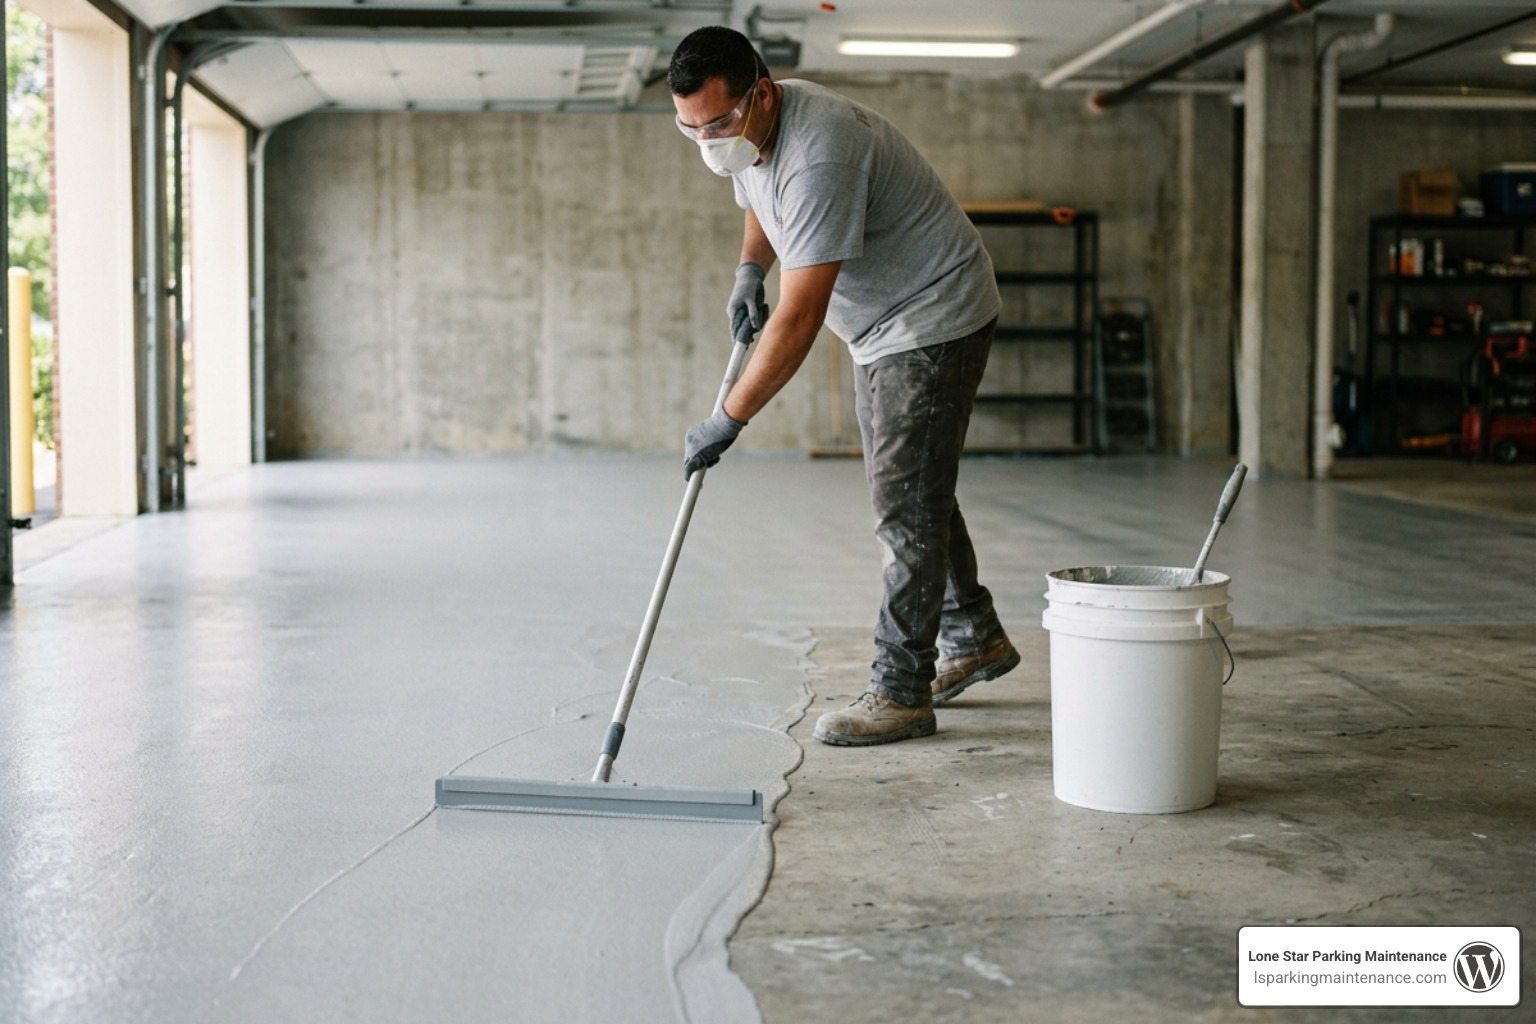
- Spread with a Gauge Squeegee: Use a dedicated long-handled rubber floor squeegee to push and pull the liquid resurfacer across the slab, maintaining a consistent depth of approximately 1/8 inch. Force the material firmly into the open concrete pores and shallow divots.
- Apply a Traction Broom Finish: Within 3 to 5 minutes of spreading (before the material develops a surface skin), lightly drag a clean, damp concrete broom across the section in uniform, parallel strokes. This broom finish creates a light, slip-resistant texture essential for wet vehicle tires.
- Curing and Hydration Management: In warm or dry conditions, mist the freshly hardened surface with a fine water spray several hours after application. This slow-curing step supports proper cement hydration and reduces micro-cracking. Keep all foot traffic off the slab for at least 6 to 8 hours.
Long-Term Durability, Project Costs, and Common Pitfalls
A properly prepared and installed resurfaced garage floor provides years of structural service, standing up to thermal shock, dropped tools, and routine tire friction. However, understanding the financial investment and ongoing maintenance requirements is essential to maximizing your floor’s lifecycle.
Budget Breakdown: DIY vs Professional Garage Floor Resurfacing Costs
Resurfacing your garage slab yourself provides substantial savings compared to hiring a contractor or tearing out and repouring concrete. Below is a breakdown of what you can expect to spend for a typical two-car garage (approximately 400 to 500 square feet).
| Expense Category | DIY Approach (Cementitious Overlay) | DIY Resinous System (Epoxy) | Professional Turnkey Installation |
|---|---|---|---|
| Materials & Primers | $150 – $250 (Resurfacer bags) | $300 – $800 (100% Solids kit) | Included in quote |
| Tool Rentals (Grinder/Vac) | $125 – $200 (1-day rental) | $125 – $200 (1-day rental) | Included in quote |
| Patching & Safety Supplies | $50 – $100 (PPE, fillers, tape) | $50 – $100 (Resin filler, PPE) | Included in quote |
| Labor Cost | $0 (Sweat equity) | $0 (Sweat equity) | $1,500 – $3,500 ($3.00–$7.00/sq ft) |
| Total Estimated Cost | $325 – $550 | $475 – $1,100 | $1,800 – $4,500+ |
For commercial facilities and larger paved areas, review the complete guide to parking lot repairs for detailed commercial cost analyses and equipment considerations.
Curing Times, Maintenance Routines, and Mistakes to Avoid
Protecting your freshly resurfaced floor requires patience during the critical curing window:
- Foot Traffic: Safe after 6 to 24 hours depending on ambient temperature.
- Light Storage / Tool Rolling: Allow a full 48 hours.
- Vehicle Parking: Wait a minimum of 72 hours for standard cementitious overlays, and 5 to 7 days for catalyzed resinous epoxy systems to reach full Shore D hardness.
To keep the floor clean and preserve its texture, maintain it with a gentle care routine. For step-by-step cleaning practices, check out our guide on how to master garage floor maintenance.
Avoid These Common Pitfalls:
- Skipping Moisture Testing: Trapped moisture vapor will push unbonded overlays right off the slab within 12 to 18 months.
- Applying to Dry, Thirsty Concrete: Pouring resurfacer onto an unmoistened slab sucks water out of the mix, leading to rapid dry-out, shrinkage cracks, and weak adhesion.
- Overworking the Mortar: Fiddling with cementitious resurfacers after their initial set window (5–10 minutes) leaves permanent squeegee ridges and ruins the broom finish texture.
- Using Acidic or Harsh Cleaners: Clean only with pH-neutral floor detergents. Harsh citrus degreasers, bleach, and muriatic acids will slowly etch cementitious overlays and degrade resin topcoats.
Frequently Asked Questions About Concrete Resurfacing
How long does a resurfaced garage slab take to cure before driving?
For a polymer-modified cementitious resurfacer, allow light foot traffic after 6 to 12 hours, but wait at least 24 to 48 hours before rolling light equipment. You should wait a full 72 hours (3 days) before driving or parking passenger vehicles on the new surface. If you applied a high-build 100% solids epoxy coating over the resurfacer, wait a minimum of 5 to 7 days before exposing the finish to hot vehicle tires and heavy point loads.
Can you apply concrete resurfacer over oil-stained or sealed concrete?
No. Concrete resurfacers rely entirely on an open, porous mechanical profile to bond to the existing slab. Any residual motor oil, hydraulic fluid, acrylic curing agents, or topical silicone sealers will act as a bond breaker, causing the overlay to blister and peel away under vehicle loads. Oil stains must be treated with commercial concrete degreasers, and any existing sealers or paints must be removed using mechanical diamond grinding before resurfacing.
What causes resurfaced garage concrete to peel or delaminate?
The three primary causes of overlay delamination are improper surface profiling (skipping mechanical grinding or relying on weak acid washes), failing to bring the slab to a Surface Saturated Dry (SSD) condition before pouring, and unmitigated moisture vapor transmission. If the concrete is dry when the resurfacer is poured, it rapidly pulls moisture out of the wet slurry, weakening the bonding polymers at the interface and resulting in hollow spots that flake under traffic.
Conclusion
Resurfacing a damaged, spalled, or pitted concrete slab is one of the most cost-effective ways to restore durability and visual appeal to your property without the disruptive cost of full slab replacement. By carefully assessing your slab’s structural health, executing thorough diamond grinding preparation, and strictly following proper mixing and curing timelines, you can achieve a clean, hard-wearing surface that handles heavy vehicle traffic for years to come.
At Lone Star Parking Maintenance, we know that whether you are restoring a residential garage slab or managing commercial surface parking facilities across the DFW Metroplex, preventative care and surface profiling are the keys to long-term concrete longevity. If your facility requires comprehensive pavement upgrades, explore our professional line striping and pavement solutions to keep your traffic corridors organized, safe, and fully compliant.